Change Hostname in Ubuntu Command Line
Don't like the computer name that was assigned automatically while installing? Here's how to change the hostname in Ubuntu.

The hostname is basically your computer's name by which it is identified on the (sub)network.
If you don't specify it while installing Ubuntu on your system or deploying it on a cloud service like DigitalOcean, it gets a hostname of its own.
And you may not always like it. I mean ap-west-ubuntu-ssd5234 or acer-234 is okay as the computer name but you can change it to something more meaningful.
Check your current hostname:
hostname
Mine is pretty neat but if you don't like yours, change the hostname in Ubuntu with this command:
hostnamectl set-hostname <new hostname>Don't worry, I'll show it in detail along with other ways of changing the hostname.
But before jumping to the how-to section, I'd like to share the rules that you'll have to keep in mind while setting up the hostname.
Hostname restrictions
The new hostname you are choosing
- Can only be made of letters, numbers, hyphens, and period characters (full stops)
- Can only be started and ended with numbers and letters
- Must have between 2 to 63 characters
So you must be ready with an interesting hostname right?
Change hostname using hostnamectl command
Ubuntu comes with systemd and it has a dedicated hostnamectl command to manage the hostname.
To change the hostname, use it like this:
hostnamectl set-hostname <new_hostname>For example, I'll be changing my previous hostname to FOSS:
hostnamectl set-hostname FOSS
Even if you reboot your Ubuntu system, the hostname change stays as it is.
Change hostname using Nmtui
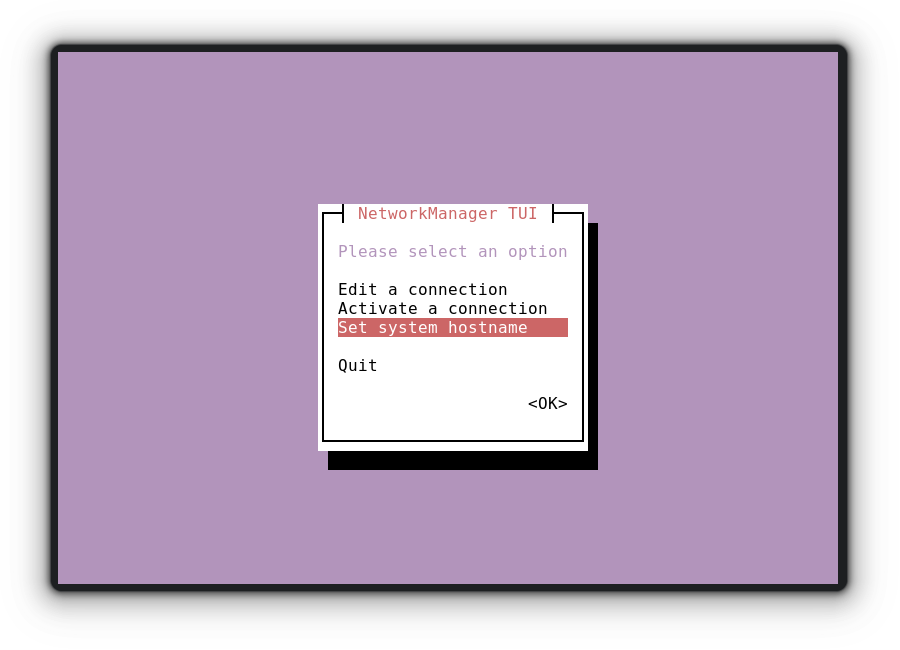
The Network Manager Text User Interface (nmtui) allows users to tweak network connections and can also be used to configure the hostname.
The nmtui utility can easily be started with the given command:
sudo nmtuiAnd navigate to the last option labeled "Set system hostname" and hit enter.
So it will open another prompt showing your current hostname and can be changed to your preferred one:
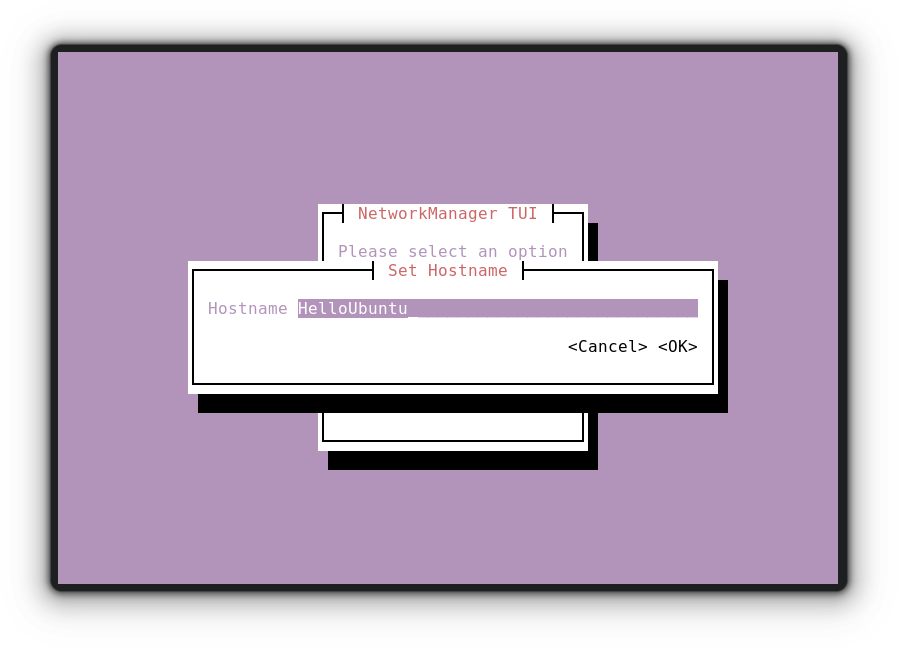
For demonstration, I changed my hostname to HelloUbuntu and to reflect those changes, you have to restart your terminal.
I'll be using the hostname command to check the updated hostname:

Change hostname by configuring /etc/hosts file
I won't recommend this method as it may create issues with DHCP services.
To achieve your goal, you'd need to configure the following files:
- /etc/hostname
- /etc/hosts
So let's start with /etc/hostname where you've to interchange the old hostname with the new one. First, use the given command to open the file to configure:
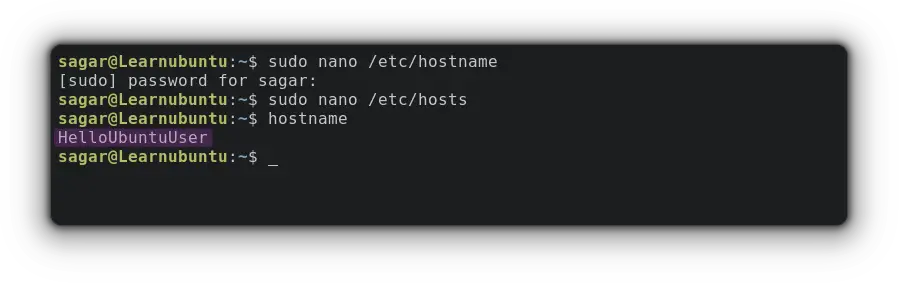
sudo nano /etc/hostname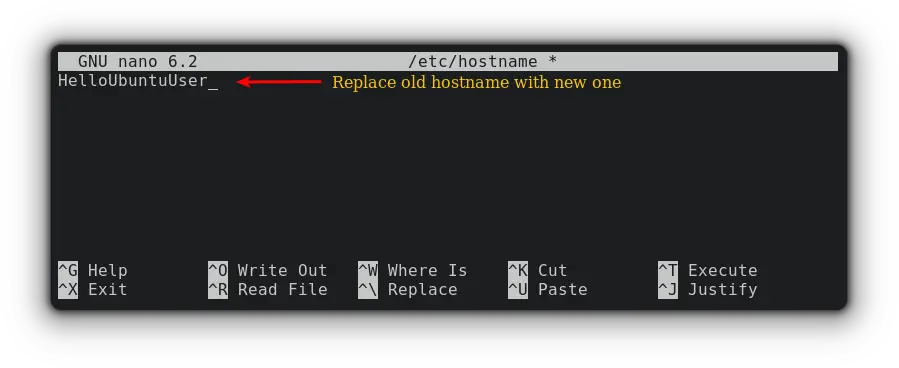
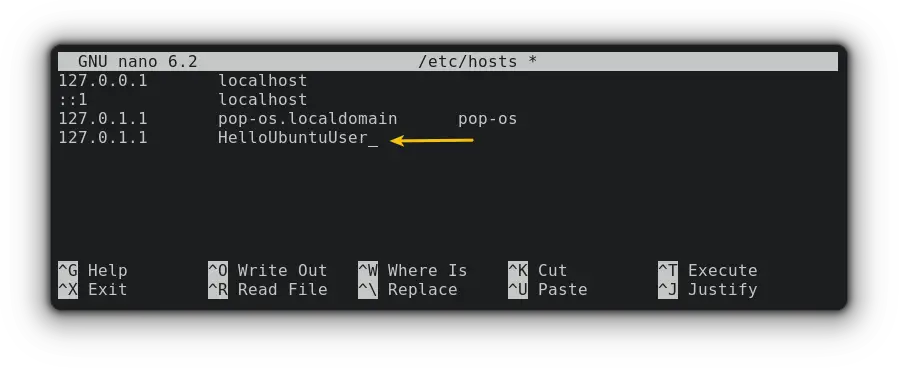
Once you're done, save changes. Now, let's open the second config file with the given command:
sudo nano /etc/hostsAnd change the hostname to what you prefer.
If you cannot find the old hostname, you can replicate the IP of the local domain and then define the new hostname.
Now, you can use hostname command to reflect those changes:
Temporarily changing the hostname
I use this method on regularly. Being a content writer, I often find myself in situations where I need a temporary hostname that will be switched back to the older one after the reboot.
The command syntax of the hostname command is pretty simple:
sudo hostname <new hostname>For example, I'd be changing my hostname to Learnubuntu:
sudo hostname Learnubuntu
Wrapping Up
In this guide, you saw different ways of changing the hostname permanently. I also included a tip on changing the hostname temporarily.
Now, it is up to you to decide which method you like the most and will use in the future.

A software engineer who loves to tinker with hardware till it gets crashed. While reviving my crashed system, you can find me reading literature, manga, or watering my plants.