Disable IPv6 in Ubuntu
Having network issues possibly because of IPv6? Here are various ways to disable IPv6.

While IPv6 was meant to be a replacement for IPv4, the protocol is still not mature enough and causes various kinds of troubles.
From configuration to maintenance, it feels like quite a hassle and comes with its own set of problems.
And at times, it creates strange network issues that magically disappear when you disable IPv6.
So in this tutorial, I will walk you through different methods to disable IPv6 in Ubuntu:
- Using sysctl (temporary)
- By editing the
/etc/sysctl.conffile - Using the grub configuration file
And in the end, I will also share how you can re-enable the IPv6.
How to disable IPv6 using sysctl (temporary)
If you want to disable IPv6 temporarily, you can use this method which will be in the effect till your next boot.
To disable IPv6 temporarily, all you have to do is execute the given 3 commands one by one:
sudo sysctl -w net.ipv6.conf.all.disable_ipv6=1
sudo sysctl -w net.ipv6.conf.default.disable_ipv6=1
sudo sysctl -w net.ipv6.conf.lo.disable_ipv6=1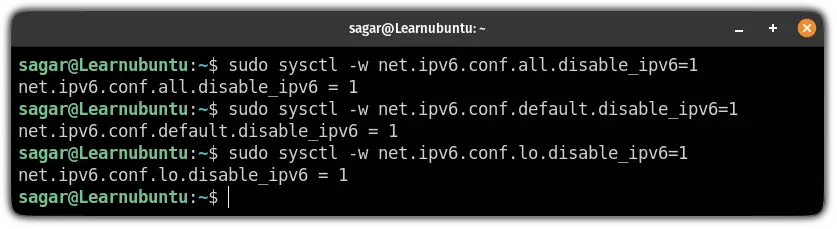
Once you execute those commands, the IPv6 is disabled.
To verify whether it is disabled successfully, check the IP address in Ubuntu using the following command:
ip a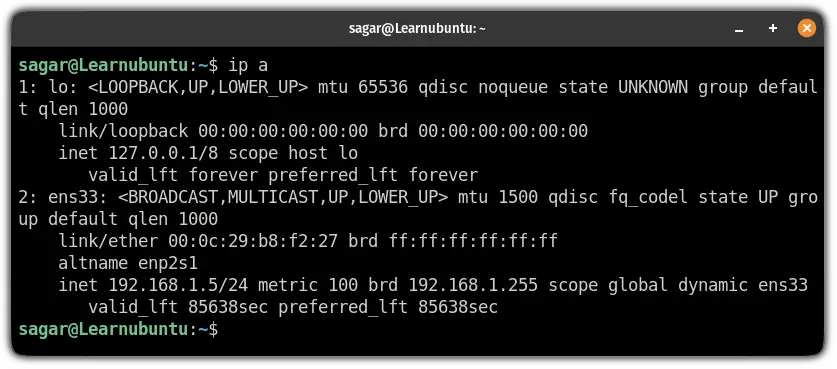
And as you can see, IPv6 is not available!
How to disable IPv6 using the /etc/sysctl.conf file
This method is a continuation of the first method here, I will be editing the /etc/sysctl.conf file to take permanent effect.
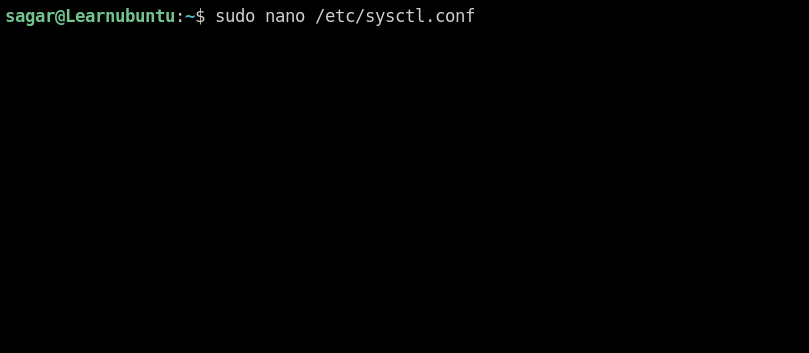
First, open the /etc/sysctl.conf file using the following command:
sudo nano /etc/sysctl.confGo to the end of the file in nano using Alt + / and paste the following lines:
net.ipv6.conf.all.disable_ipv6=1
net.ipv6.conf.default.disable_ipv6=1
net.ipv6.conf.lo.disable_ipv6=1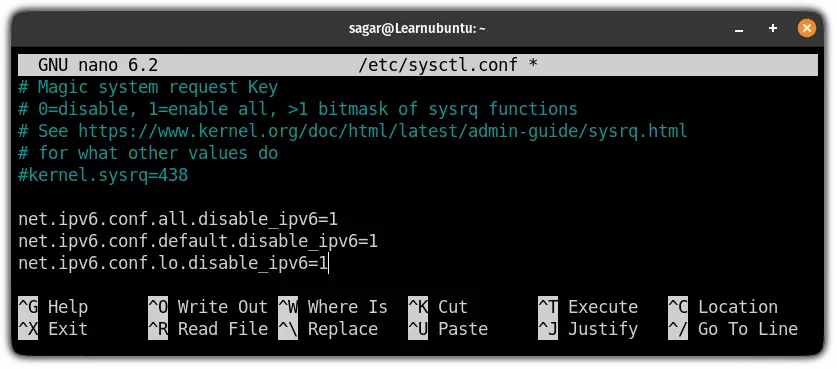
Save changes and exit from the nano text editor.
To take effect from the changes you made to the config file, reload the sysctl config using the following command:
sudo sysctl -pFor some users, after rebooting the IPv6 will be enabled so for that purpose, you will have to create a file named rc.local inside the /etc directory:
sudo nano /etc/rc.localAnd enter the following inside that file:
#!/bin/bash
# /etc/rc.local

/etc/sysctl.d
/etc/init.d/procps restart

exit 0
Save changes and exit from the text editor.
And finally, change the file permissions to make that file work:
sudo chmod 755 /etc/rc.localThat's it! You have disabled the IPv6 permanently.
How to disable IPv6 using the GRUB config file
Using the GRUB for disabling IPv6 is quite convenient and my preferred way.
First, open the config file:
sudo nano /etc/default/grubIn this config file, you will have to change 2 lines.
From:
GRUB_CMDLINE_LINUX_DEFAULT=""
GRUB_CMDLINE_LINUX=""
To:
GRUB_CMDLINE_LINUX_DEFAULT="quiet splash ipv6.disable=1"
GRUB_CMDLINE_LINUX="ipv6.disable=1"
The end result should look like this:
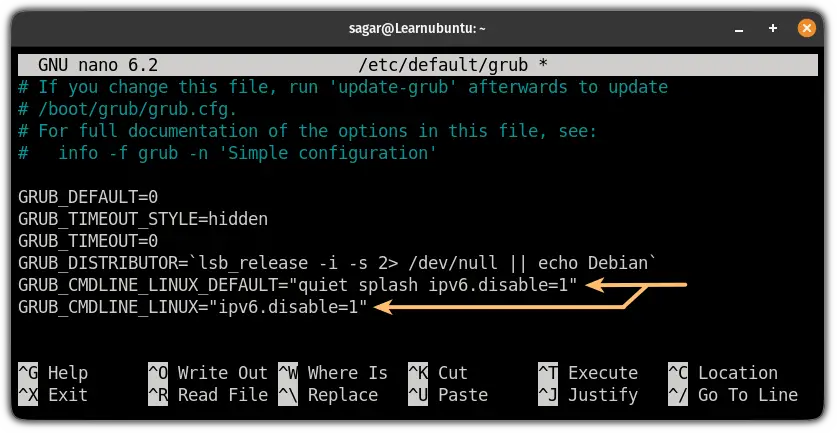
Save changes and exit from the text editor.
To take effect from the changes you made, use the following command:
sudo update-grubReboot your system and IPv6 will be disabled!
How to re-enable IPv6 in Ubuntu
If you used any of the 3 ways shown in the tutorial to disable the IPv6, here's how you can disable it.
If you used the sysctl command to temporarily disable IPv6
I know what you might be thinking!
If this is the temporary way then rebooting the system should enable IPv6. Right?
Sure, you can do that way too but when you are dealing with servers, you might not want to reboot your active system!
And in that case, you will have to use the given 3 commands one by one to alter the effect:
sudo sysctl -w net.ipv6.conf.all.disable_ipv6=0
sudo sysctl -w net.ipv6.conf.default.disable_ipv6=0
sudo sysctl -w net.ipv6.conf.lo.disable_ipv6=0
If you used the /etc/sysctl.conf file to disable IPv6
So if you configured the /etc/sysctl.conf file to disable the IPv6, all you have to do is remove those lines which you added to enable IPv6.
First, open the /etc/sysctl.conf file:
sudo nano /etc/sysctl.confAnd remove the lines:
Next, remove the rc.local file:
sudo rm /etc/rc.localNow, use the following command to reload the file:
sudo sysctl -pIf that does not enable the IPv6, reboot your system.
If you used the GRUB config file to disable IPv6
First, open the GRUB config file:
sudo nano /etc/default/grubAnd change these 2 lines from:
GRUB_CMDLINE_LINUX_DEFAULT="quiet splash ipv6.disable=1"
GRUB_CMDLINE_LINUX="ipv6.disable=1"
To:
GRUB_CMDLINE_LINUX_DEFAULT=""
GRUB_CMDLINE_LINUX=""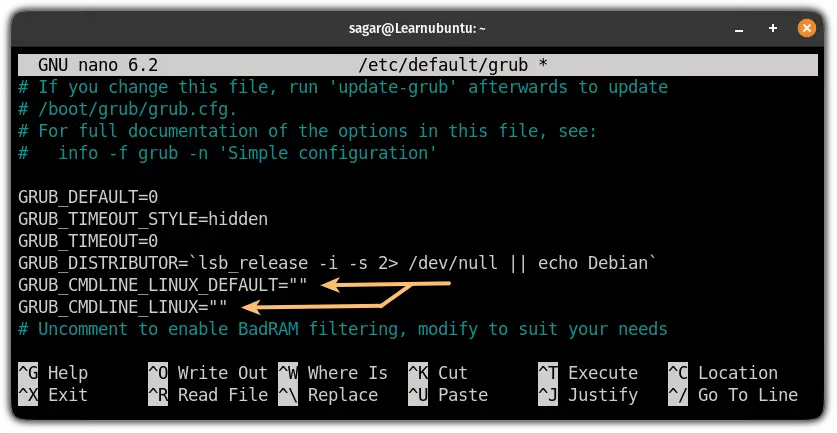
Save changes and exit from the text editor.
Now, update the GRUB config:
sudo update-grubReboot your system and IPv6 will be enabled!
Want to set up static IP in Ubuntu?
If you want to setup a static IP in Ubuntu, we have a detailed guide for that purpose:

I hope you will find this guide helpful.
And if you have any doubts, let me know in the comments.

A software engineer who loves to tinker with hardware till it gets crashed. While reviving my crashed system, you can find me reading literature, manga, or watering my plants.