Install ElasticSearch on Ubuntu
Want to explore the famed Elastic Search? Learn to install Elastic Search on Ubuntu using their official repositories.

ElasticSearch is one of the most popular search engines used for the tasks like text search, business analytics, security intelligence, and more.
And in this tutorial, I will walk you through how you can install EasticSearch and configure it on Ubuntu.
How to install ElasticSearch on Ubuntu
ElasticSearch is not available in the default repository of Ubuntu, so for the installation, you will have to use their repositories.
That's a good thing. You'll get the latest stable version and it gets updated along with the system updates.
But before jumping to the installation, you will have to install apt-transport-https package so that you can use apt command to interact with a repository using https protocol:
sudo apt install apt-transport-httpsFirst, add the public signing key:
wget -qO - https://artifacts.elastic.co/GPG-KEY-elasticsearch | sudo gpg --dearmor -o /usr/share/keyrings/elasticsearch-keyring.gpgNow, save the repository definition to your system:
echo "deb [signed-by=/usr/share/keyrings/elasticsearch-keyring.gpg] https://artifacts.elastic.co/packages/8.x/apt stable main" | sudo tee /etc/apt/sources.list.d/elastic-8.x.listAnd finally, update the repository index and install the ElasticSearch package:
sudo apt update && sudo apt install elasticsearchThat's it! You have successfully installed ElasticSearch on Ubuntu.
How to configure ElaticSearch on Ubuntu
By default, the ElasticSearch will only work locally and for most users, that will be good enough.
You have two choices here:
- Make is discoverable from anywhere
- Specify the instance from where you want to access the ElasticSearch
In both cases, you will have to make one change to the configuration file.
First, open the configuration file using the following command:
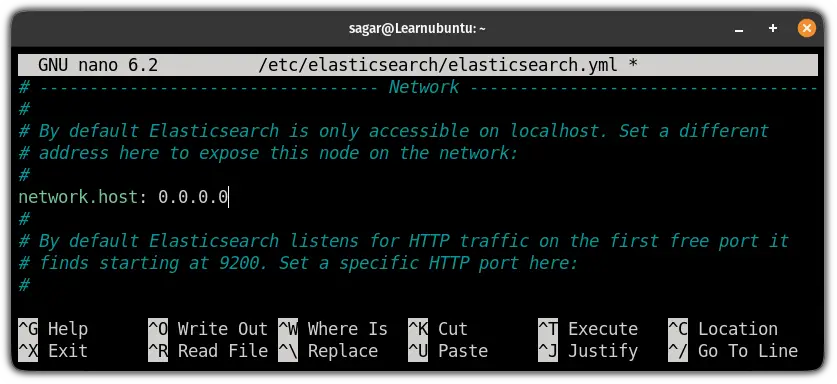
sudo nano /etc/elasticsearch/elasticsearch.ymlNow, look for the network.host line, and uncomment the line.
If you want to make it accessible from everywhere, use 0.0.0.0 for the network host:
And if you want to specify a single instance from where you can access the ElasticSearch, specify the IP address:
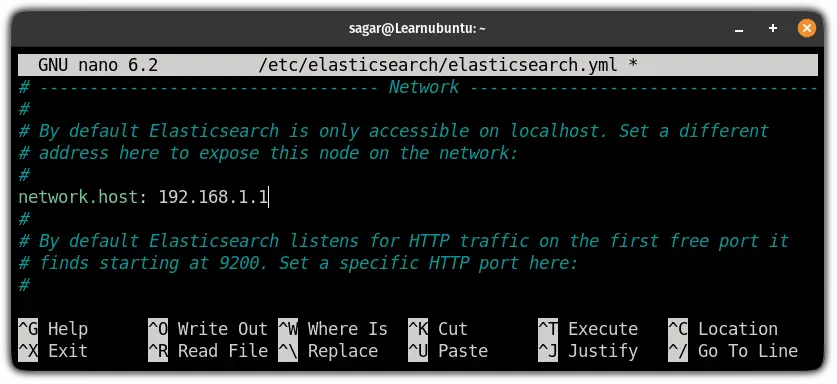
Save changes and exit from the nano text editor.
Turn off security features
Security features are enabled by default which requires a username and password so if you have configured one you can skip this step.
If you try using ElasticSearch in the default configuration without user credentials, it will show you an error saying: curl: (52) Empty reply from server in ElasticSearch on ubuntu

To use ElasticSearch without user credentials, all you have to do is disable the security features from the configuration file.
First, open the configuration file:
sudo nano /etc/elasticsearch/elasticsearch.ymlLook for the xpack.security.enabled: true line and change it to false:
xpack.security.enabled: false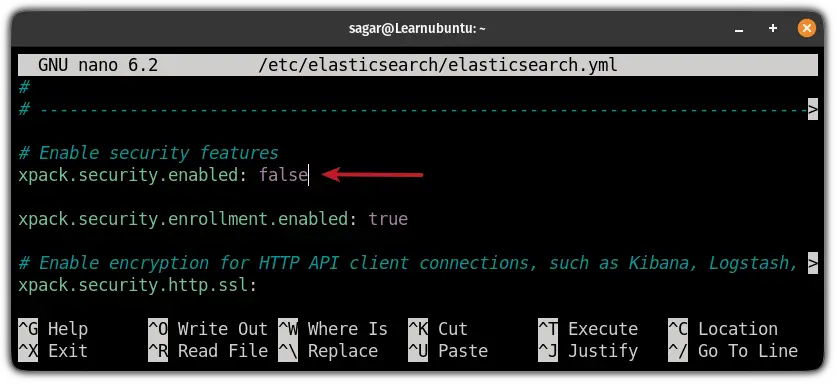
Test ElasticSearch
ElasticSearch listens to port no 9200 so you can test the ElasticSearch by using the curl to send an HTTP request:
curl -X GET "localhost:9200"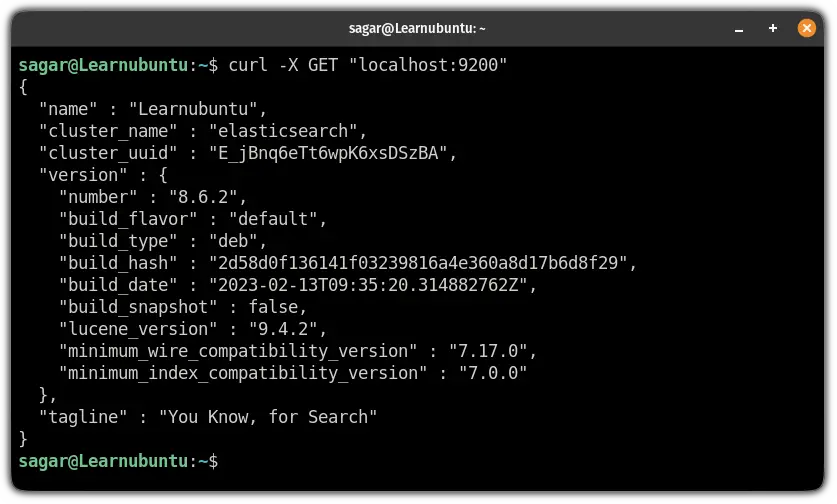
And if you've done everything correctly, it will show you details like shown in the above image.
Wrapping Up
You can remove Elastic Search like you uninstall any other package in Ubuntu:
sudo apt remove elasticsearchThe configuration files will still remain so you may want to use the purge option.
This was a quick tutorial on how you can install ElasticSearch on Ubuntu. I hope you will find this guide helpful.
And if you have any queries, let me know in the comments.

A software engineer who loves to tinker with hardware till it gets crashed. While reviving my crashed system, you can find me reading literature, manga, or watering my plants.