Install and Set Up Fail2Ban on Ubuntu
Fail2ban is an easy to use tool for thwarting common bot attacks on Linux servers. Learn to install and use Fail2Ban.

Fail2Ban is mainly used to prevent DOS attacks.
You may ask how?
Well, it monitors the log files for authentication failure and can be used to create certain rules by which you can block the request IP after certain tries.
In this guide, I will walk you through the installation of Fail2Ban on Ubuntu. I will also share a quick example so that you can have a better idea of its usage.
Install Fail2Ban on Ubuntu
You will find Fail2Ban in the default repository of Ubuntu which means it can be installed through a single command:
sudo apt install fail2ban Next, start the fail2ban:
sudo systemctl start fail2banAnd you may also want to enable with your system boot so that it is automatically started:
sudo systemctl enable fail2banHow to configure Fail2Ban on Ubuntu
The first step is to create a copy of fail2ban.conf and jail.conf files with .local extension.
To do so, first, change your directory to the fail2ban:
cd /etc/fail2ban/Now, use the following command to create a copy of the required files:
sudo cp jail.conf jail.local
sudo cp fail2ban.conf fail2ban.local
The reason why I made copies of two files with the .local extension is quite simple.
When you update fail2ban, it may override the original configuration file, and when you have files with the .local extension, the change will only be applied to them, not to the original files.
To list services protected by fail2ban, you can use the given command:
sudo fail2ban-client status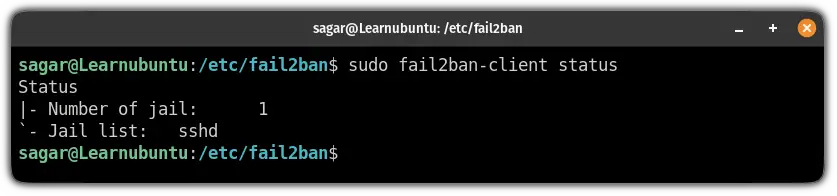
And by default, you will find the SSH daemon in this list.
To enable other services apart from ssh, open the jail.local file, find the service, and add the following line to the service section:
enabled = true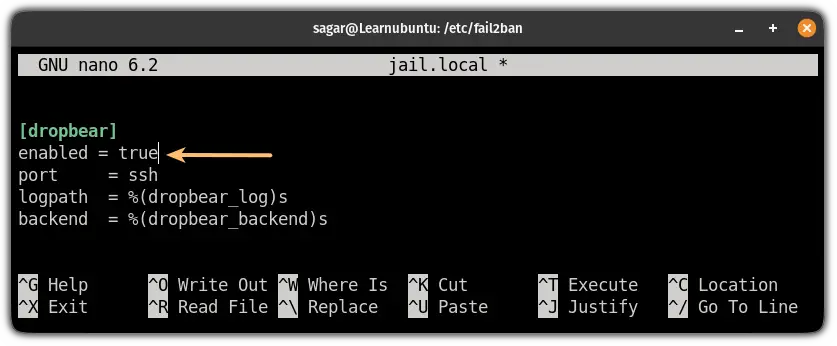
But to make this guide more accessible, I will be using an ssh example here.
By default, the fail2ban is configured to ban the IP for 10 mins after 5 failed tries within the span of 10 mins.
For the sake of this guide, I changed the maximum number of tries to 2 and the ban of IP for 30 mins from the jail.local file:
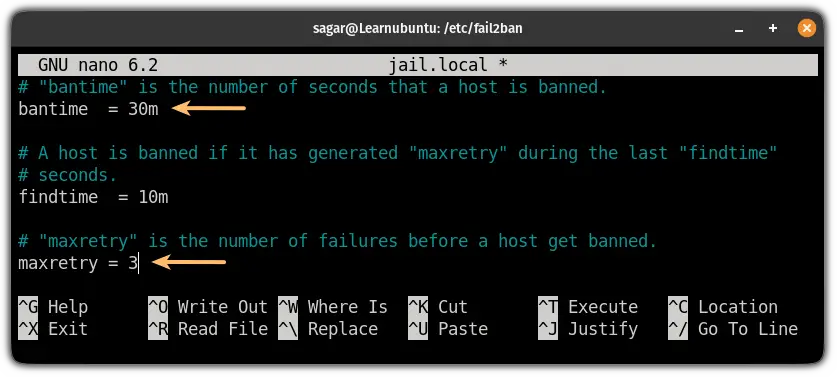
Save changes and exit from the nano text editor.
To activate the changes, reload the configuration:
sudo fail2ban-client reloadNow, let's put this to the test.
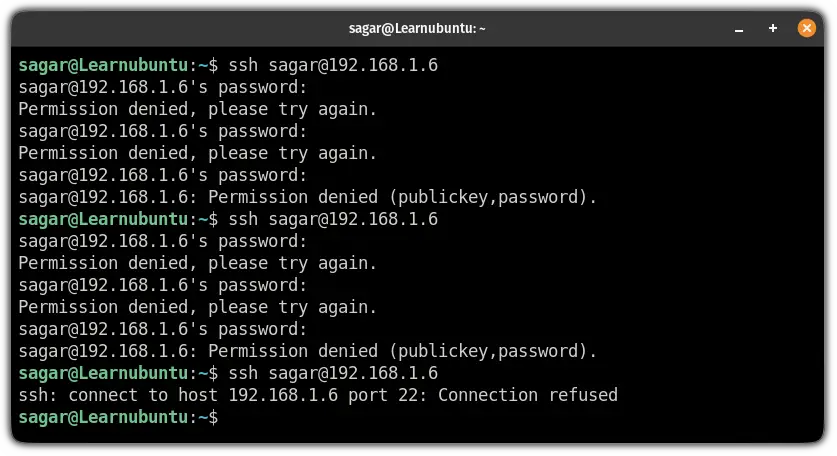
In SSH, it considers 1 failed attempt when you enter the incorrect password 3 times.
So when I entered the wrong password 2 times, it blocked me and won't even let me enter the password 3rd time:
You can check the logs for fail2ban using the following command:
sudo nano /var/log/fail2ban.log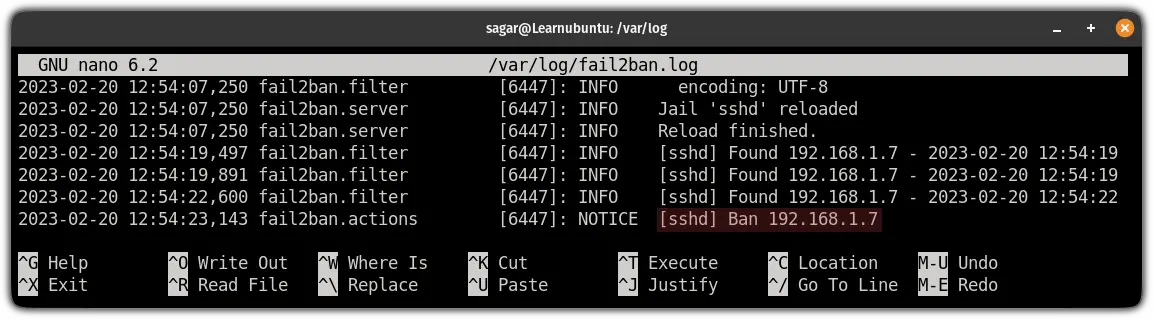
And as you can see, it blocked the IP after three unsuccessful tries.
Add it to your server defenses
Apart from keeping your server updated, you can use the UFW firewall and Fail2Ban to add extra layers of security to it. Not familiar with UFW? This guide will help you.
Let me know if you have questions and suggestions.

A software engineer who loves to tinker with hardware till it gets crashed. While reviving my crashed system, you can find me reading literature, manga, or watering my plants.