How to install OpenSSL on Ubuntu Server
A detailed, step-by-step beginner's guide to installing OpenSSL on Ubuntu servers. You also learn about configuring OpenSSL shared libraries.

The OpenSSL utility is used to have secure communications with authentication and even lets you encrypt connections.
Sounds cool, right?
You will find the most recent LTS version (3.0) of OpenSSL in the apt repository which can be installed using the given command:
sudo apt install opensslBut what if you want to install an older LTS version (still maintained)? Well, here's a detailed guide for manual installation.
But before that, let's have a look at what are the different offerings we have when it comes to installing OpenSSL.
The OpenSSL versioning scheme explained
There are two variants of OpenSSL while writing:
- Old versioning scheme (1.1.1)
- New versioning scheme (3.0.7)
Old versioning scheme
The old versioning scheme uses 3 digits separated by dots and followed by a letter.
- The first two digits are used to show the major release version and there is no backward compatibility. (Server running 1.1 will not work with a client having 1.0)
- While the last digit shows a minor release with new features and has backward compatibility. Meaning, you can use OpenSSL 1.1.3 on the server and the client will work as expected with 1.1.2!
- And there is a letter, in the end, indicating bug fixes and is backward compatible so you can have 1.1.1f on the server and 1.1.1e on the client and it will get your job done.
And this will only be supported until 11th September 2023.
New versioning scheme
The new versioning scheme is divided into 3 letters separated by dots and unlike the old scheme, there is no alphabet at the end.
- The first digit shows the major release and it is not backward compatible (3.1 won't work with 1.0).
- The second digit shows a minor release with new features added and it is backward compatible (3.1 will work with 3.2)
- And the last digit shows the patch version with bug fixes and it is also backward compatible.
The latest OpenSSL series 3.0 is supported until 7th September 2026.
Install OpenSSL manually in Ubuntu
As the manual process required building OpenSSL, you'd have to install the prerequisites:
sudo apt install build-essential checkinstall zlib1g-dev -yIn this section, I'm going with OpenSSL's old LTS version (1.1.1).
Once you're done with installing prerequisites, change your directory to /usr/local/src/:
cd /usr/local/src/Now, use the wget command to download OpenSSL:
sudo wget https://www.openssl.org/source/openssl-1.1.1s.tar.gzOnce you are done with downloading, extract the tar file using the tar utility:
sudo tar -xf openssl-1.1.1s.tar.gzAnd navigate to the recently extracted tar file:
cd openssl-1.1.1sNow, let's start the installation process by configuration process and it should give you make file:
sudo ./config --prefix=/usr/local/ssl --openssldir=/usr/local/ssl shared zlib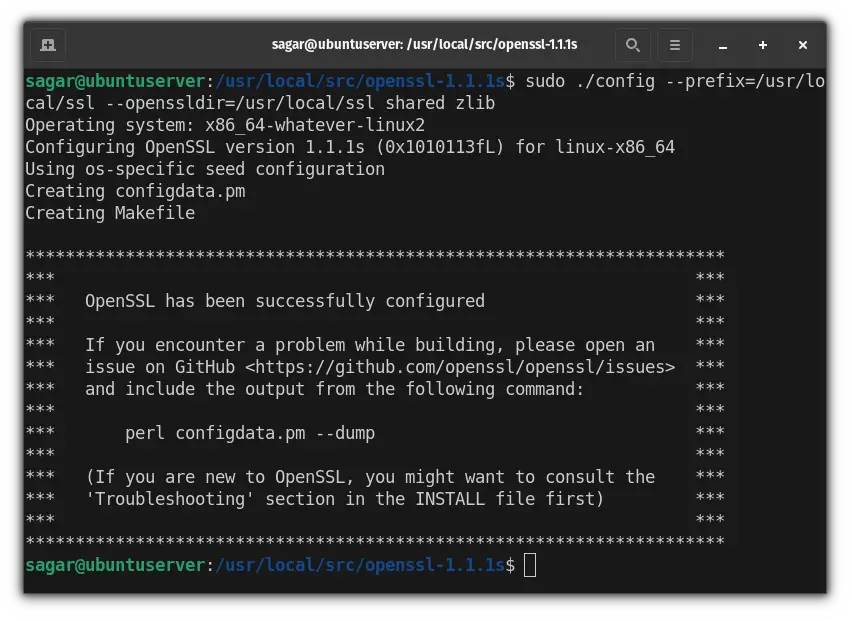
Now, let's invoke the make command to build OpenSSL:
sudo makeTo check whether there are no errors in the recent build, use the given command:
sudo make test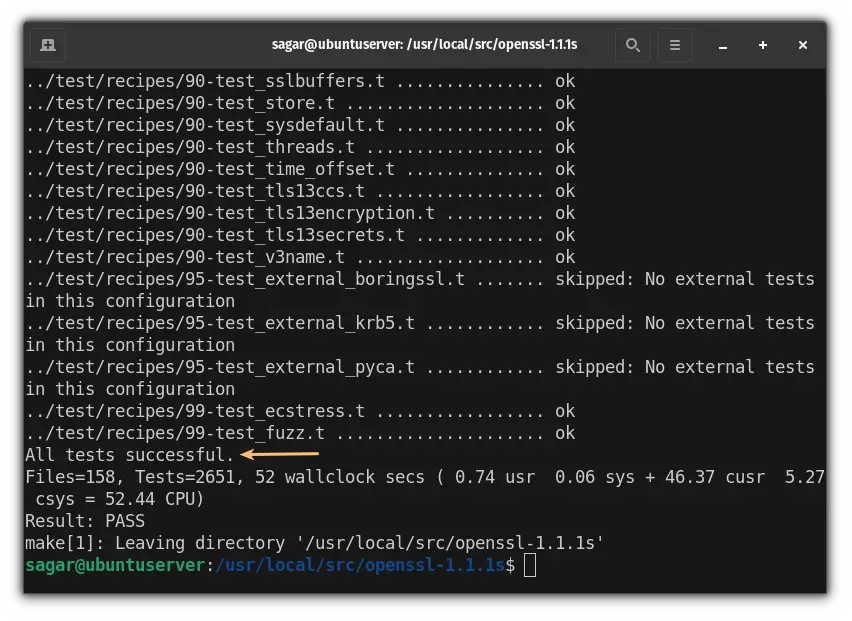
And if everything goes right, you will get the message "All tests successful". So now, you can proceed with the installation:
sudo make installConfigure OpenSSL shared libraries
First, let's create openssl-1.1.1s.conf for OpenSSL shared libraries at /etc/ld.so.conf.d/ using the given command:
sudo nano /etc/ld.so.conf.d/openssl-1.1.1s.confAnd add the following line to that config file:
/usr/local/ssl/lib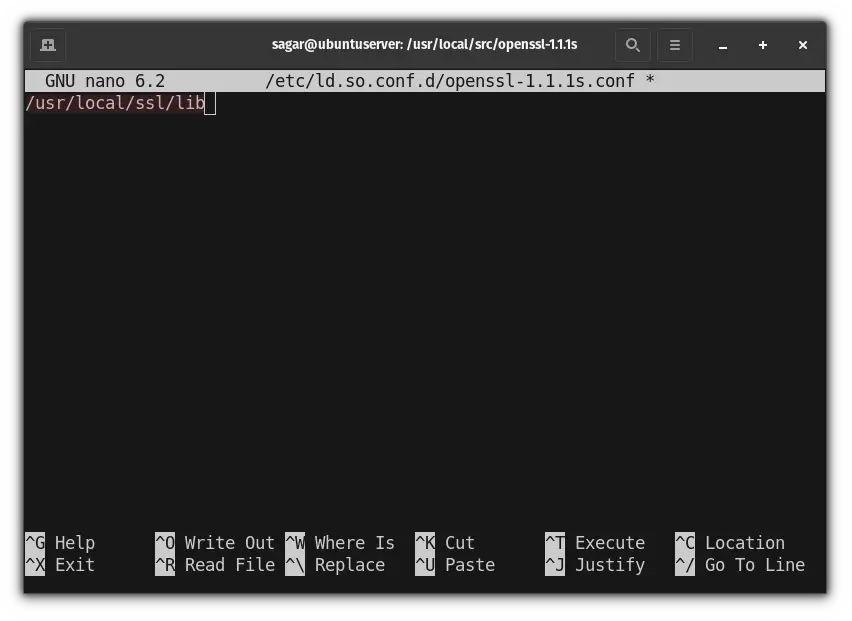
Save the config file and reload it to apply recently made changes using the given command:
sudo ldconfig -vConfigure OpenSSL Binary
In this section, I'm going to create a backup for old OpenSSH binaries and then replace the binaries for the old version (at /usr/bin/openssl) with recently installed one (at /usr/local/ssl/bin/openssl).
Use the given command to create a backup for binaries and copy them:
sudo mv /usr/bin/c_rehash /usr/bin/c_rehash.backup
sudo mv /usr/bin/openssl /usr/bin/openssl.backup
Now, open the environment PATH variable using the given command:
sudo nano /etc/environmentAnd add :/usr/local/ssl/bin to the end to add /usr/local/bin/openssl folder to the PATH variable:
PATH="/usr/local/sbin:/usr/local/bin:/usr/sbin:/usr/bin:/sbin:/bin:/usr/games:/usr/local/games:/usr/local/ssl/bin"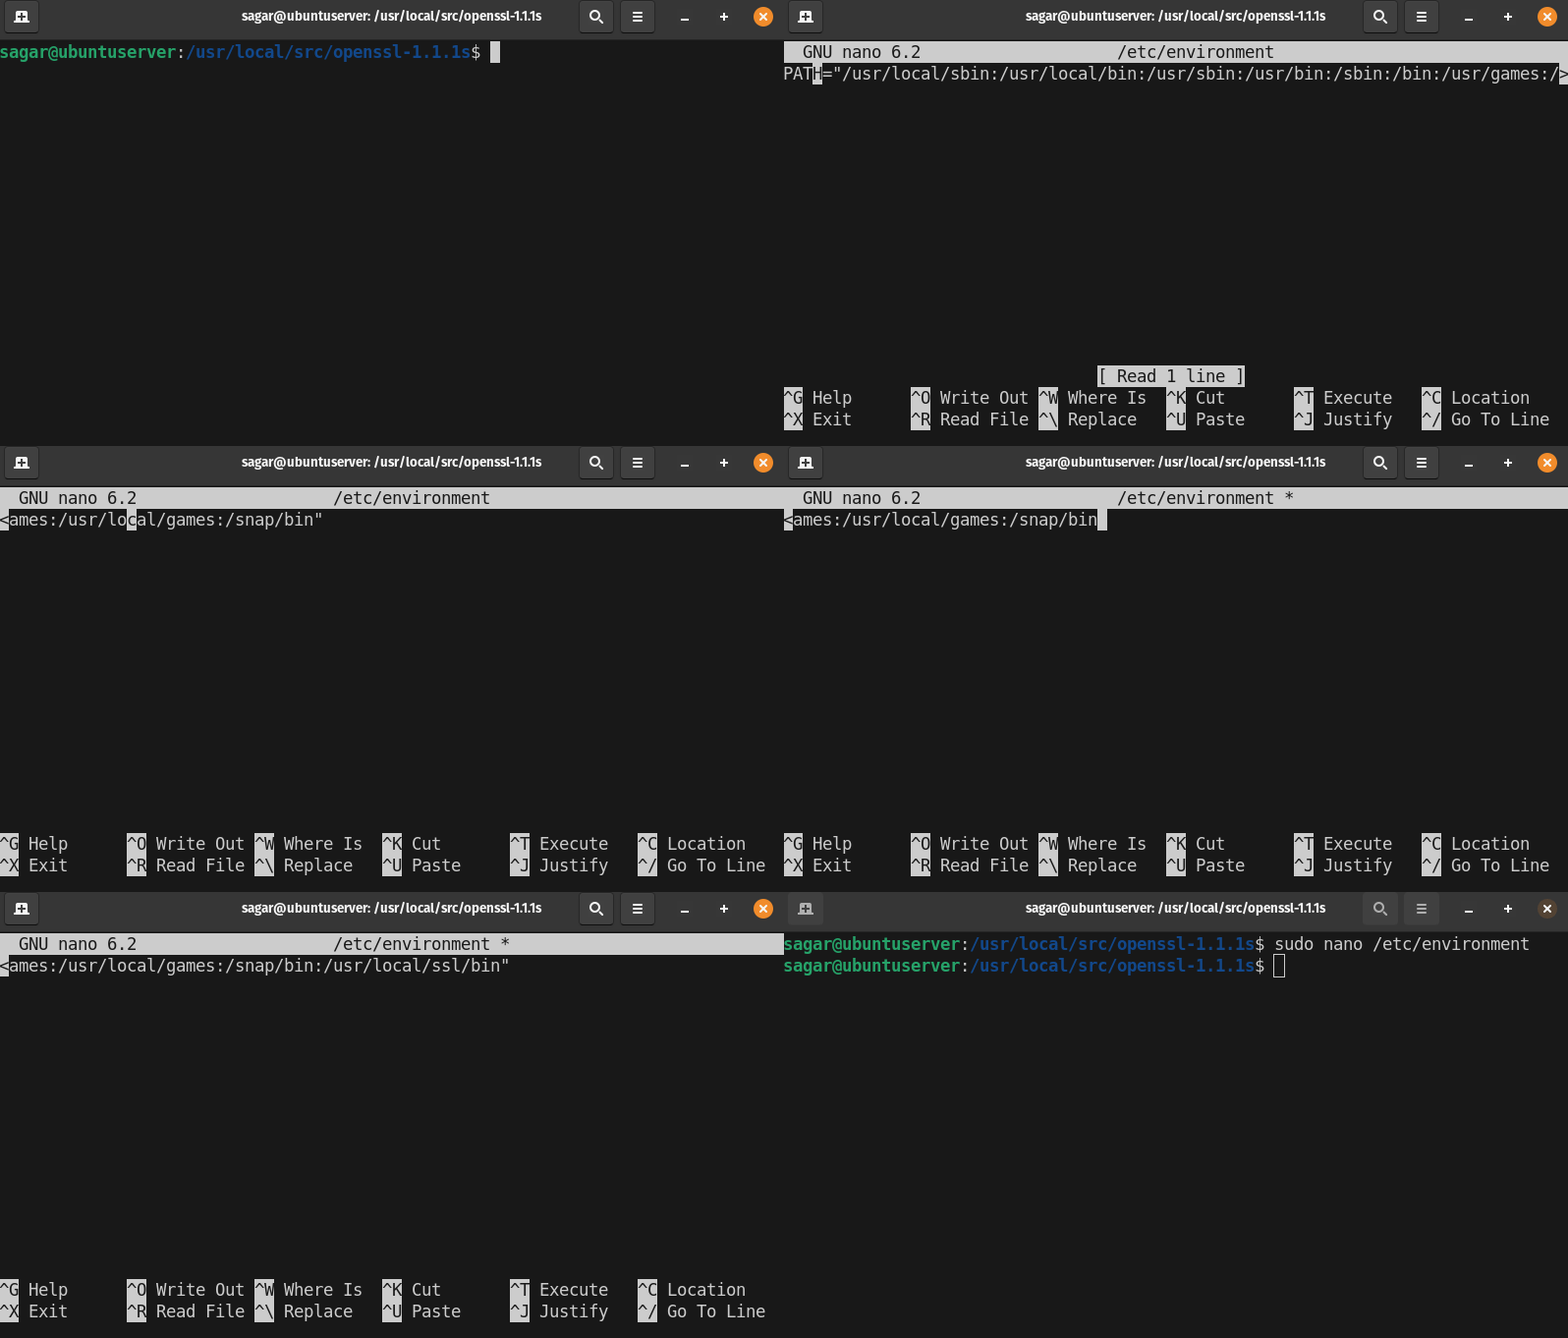
Save and exit the editor and now reload the PATH variable using the given command:
source /etc/environmentNow, you can check for the installed OpenSSH version:
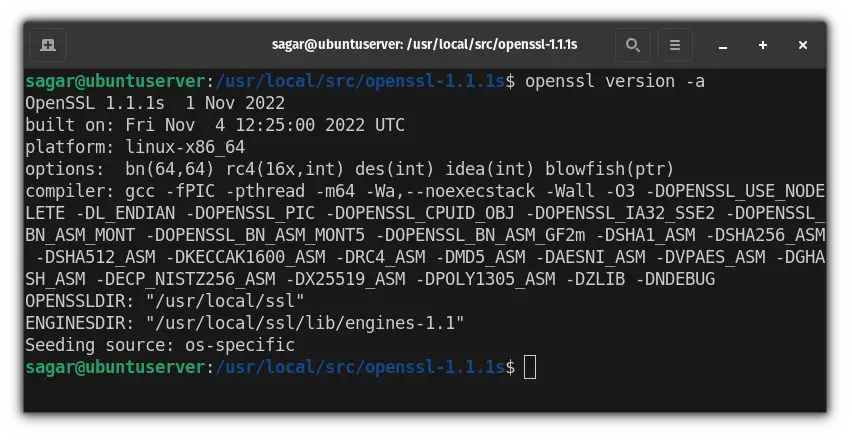
openssl version -aAnd if everything went as expected, it should get you similar output:
Wrapping Up
Through this guide, I explained how you can use apt to install OpenSSL, including how to install the previous LTS version manually.
And if you have any queries or confusion in any of the given steps, feel free to ask in the comments.
A software engineer who loves to tinker with hardware till it gets crashed. While reviving my crashed system, you can find me reading literature, manga, or watering my plants.
