Install RabbitMQ on Ubuntu
Learn about installing and configuring the open source RabbitMQ on Ubuntu-based Linux distributions.

RabbitMQ is open-source message broker software.
And if you are curious, the job of the message broker is to receive messages from publishers and route them to the consumers.
So in this tutorial, I will walk you through step-by-step how you can install RabbitMQ on Ubuntu.
How to install RabbitMQ on Ubuntu 22.04
So let's start the installation process with the necessary pre-requisites:
sudo apt install curl gnupg apt-transport-httpsNow, let's add repository signing keys for RabbiMQ main, ErLang, and RabbitMQ PackageCloud repositories one by one:
curl -1sLf "https://keys.openpgp.org/vks/v1/by-fingerprint/0A9AF2115F4687BD29803A206B73A36E6026DFCA" | sudo gpg --dearmor | sudo tee /usr/share/keyrings/com.rabbitmq.team.gpg > /dev/nullcurl -1sLf "https://keyserver.ubuntu.com/pks/lookup?op=get&search=0xf77f1eda57ebb1cc" | sudo gpg --dearmor | sudo tee /usr/share/keyrings/net.launchpad.ppa.rabbitmq.erlang.gpg > /dev/nullcurl -1sLf "https://packagecloud.io/rabbitmq/rabbitmq-server/gpgkey" | sudo gpg --dearmor | sudo tee /usr/share/keyrings/io.packagecloud.rabbitmq.gpg > /dev/nullIn case, if you're wondering, these signing keys will be helpful to validate the authenticity of packages.
Now, it's time to add repositories for ErLang and RabbitMQ.
First, create a new file named rabbitmq.list at /etc/apt/sources.list.d by using the following command:
sudo nano /etc/apt/sources.list.d/rabbitmq.listAnd it will open a nano text editor for rabbitmq.list file. Now, What you have to do is add the lines to that file:
deb [signed-by=/usr/share/keyrings/net.launchpad.ppa.rabbitmq.erlang.gpg] http://ppa.launchpad.net/rabbitmq/rabbitmq-erlang/ubuntu jammy main
deb-src [signed-by=/usr/share/keyrings/net.launchpad.ppa.rabbitmq.erlang.gpg] http://ppa.launchpad.net/rabbitmq/rabbitmq-erlang/ubuntu jammy main
deb [signed-by=/usr/share/keyrings/io.packagecloud.rabbitmq.gpg] https://packagecloud.io/rabbitmq/rabbitmq-server/ubuntu/ jammy main
deb-src [signed-by=/usr/share/keyrings/io.packagecloud.rabbitmq.gpg] https://packagecloud.io/rabbitmq/rabbitmq-server/ubuntu/ jammy main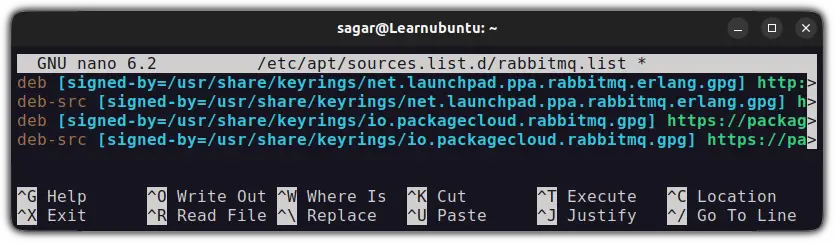
Now, save changes and exit from the nano text editor.
Once done, you'd have to update the repositories to take effect from the changes you made recently:
sudo apt updateNext, you'd need to install erlang packages:
sudo apt install -y erlang-base \
    erlang-asn1 erlang-crypto erlang-eldap erlang-ftp erlang-inets \
    erlang-mnesia erlang-os-mon erlang-parsetools erlang-public-key \
    erlang-runtime-tools erlang-snmp erlang-ssl \
    erlang-syntax-tools erlang-tftp erlang-tools erlang-xmerl
And finally, you can use the given command to install RabbitMQ:
sudo apt install rabbitmq-server -y --fix-missingIf everything goes as expected, the following command will bring the installed version of RabbitMQ:
sudo rabbitmqctl version
But just installation might not get the job done. So let's have a look at some basic configurations of RabbitMQ.
How to configure RabbitMQ on Ubuntu
By default, the RabbitMQ should be up and running after installation. To check its status, you can use the following command:
systemctl status rabbitmq-server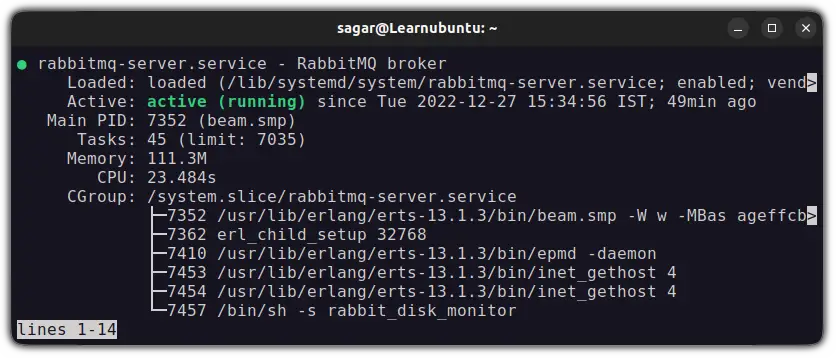
And if it is not running as intended, you can use the following command to start the RabbitMQ service:
systemctl start rabbitmq-serverNow, let's enable the RabbitMQ management console.
Enable RabbitMQ management console in Ubuntu
Even with the default installation, you get various plugins with RabbitMQ and one of them is rabbitmq_management.
The rabbitmq_management is a GUI interface that can be accessed through the browser and lets you manage RabbitMQ in the easiest way possible.
And it can be enabled using the following command:
sudo rabbitmq-plugins enable rabbitmq_managementNow, it can be accessed by appending 15672 to your IP address in the browser:
http://server-ip:15672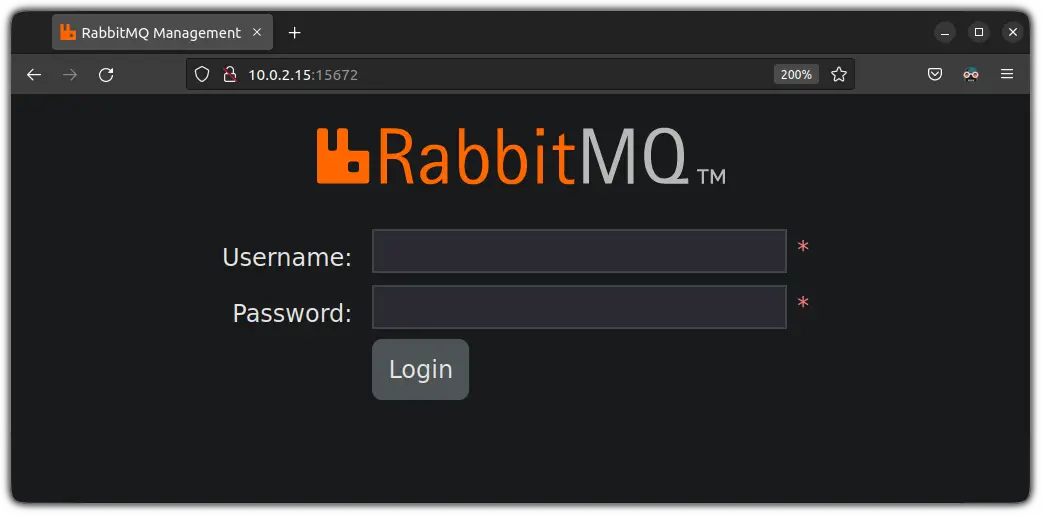
We have a detailed guide on how you can find IP addresses on Ubuntu, in case, if you don't know how to.
But till now, we haven't created any users, so let's create one.
Create a user account for RabbitMQ
To create a user for RabbitMQ, all you need to do is follow the given command syntax:
sudo rabbitmqctl add_user <username> <secure_password>For instance, I created a new user named sagar:
sudo rabbitmqctl add_user sagar MyS3cur3Passwor_d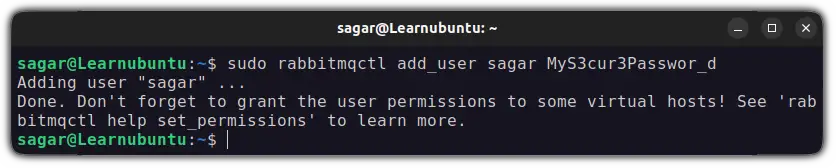
Similarly, if you want to make the created user an admin, it can be done using the administrator tag:
rabbitmqctl set_user_tags <username> administratorNow, you can list the users with their tags:
rabbitmqctl list_users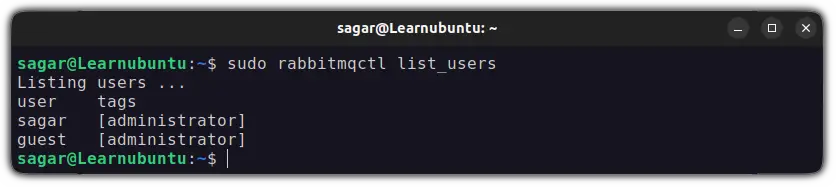
And if you notice, there is another user named guest with admin privileges. You are advised to remove the guest user for security reasons.
You can use the following command to remove the guest user:
sudo rabbitmqctl delete_user guestNow, let's create a virtual host for RabbitMQ.
Create a virtual host for RabbitMQ on Ubuntu
A virtual host for RabbitMQ is nothing but isolated containers that contain logical groups, users with specific permission, queues, and other objects.
And the virtual host can easily be created by using add_vhost flag:
sudo rabbitmqctl add_vhost <virtual_host>Here, I created a virtual host named Abhiman:
sudo rabbitmqctl add_vhost abhimanNow, you can use the following command to list available virtual hosts:
sudo rabbitmqctl list_vhosts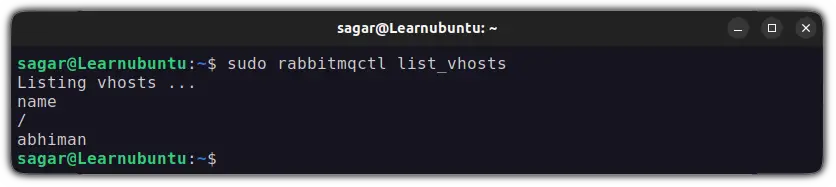
And as you can see, there is another virtual host named /. This can easily be removed using the delete_vhost flag:
sudo rabbitmqctl delete_vhost /Now, let's add the user that was created initially to the virtual host and set permissions.
Assign permissions to the user on the virtual host
You can easily assign permission to the user on the virtual host by using the following command syntax:
sudo rabbitmqctl set_permissions -p <virtual_host> <user_name> <permissions>Here, I assign full permission to the user named sagar on the abiman virtual host:
sudo rabbitmqctl set_permissions -p abhiman sagar ".*" ".*" ".*"Seems complex. Right? Let me break it down for you.
Here,
-pis used to specify the virtual host.- The first
.*sign grants the configuration to every virtual host entity such as declaring exchanges, working with queues, etc. - The second
.*sign grants write permission to every virtual host entity that is available to you which includes publishing messages, creating bindings, and so on. - The third
.*sign grants read permissions by which you can read messages, queues, etc.
You can use list the permissions with users on a virtual host by using the following:
sudo rabbitmqctl list_permissions -p <virtual_host>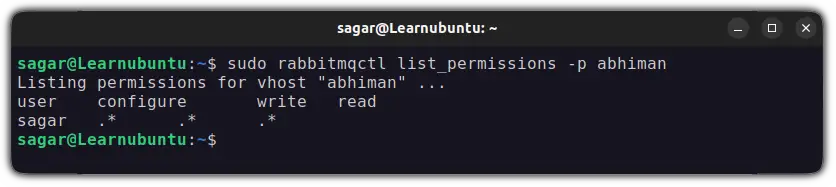
And now, you can use the username and password to log in to the web console:

And it is working as intended!
Wrapping Up
In this guide, I explained how you can install and do basic configurations for RabbitMQ on Ubuntu.
And if you encounter any errors while executing the commands I showed, let me know in the comments!

A software engineer who loves to tinker with hardware till it gets crashed. While reviving my crashed system, you can find me reading literature, manga, or watering my plants.