Install and Use gParted on Ubuntu
The graphical tool GParted lets you check the disk space, format a disk, create partitions and a lot more.
GParted reads for GNOME Partition Editor, a powerful and user-friendly utility to manage disk partitions on Linux.
So in this tutorial, I will walk you through how you can install GParted in Ubuntu and later on will share some basic tasks you can perform using GParted.
Let's start with the installation.
How to install GParted in Ubuntu
GParted is available in the default repository of Ubuntu which means it can be installed with a single command:
sudo apt update && sudo apt install gpartedTo verify the installation, check the installed version using the following command:
apt policy gparted
As you can see, it gave me the GParted version 1.3.1.
Now, let's have a look at how to use GParted.
How to use GParted in Ubuntu
In this tutorial, I will be using a disk drive to demonstrate how you can perform basic tasks in GParted that are:
- Format drive in different filesystem
- Resizing partitions
- Remove partitions
So let's start with the first one.
Format partition in different filesystem
To format the partition in the different filesystem type, then here's how you do it.
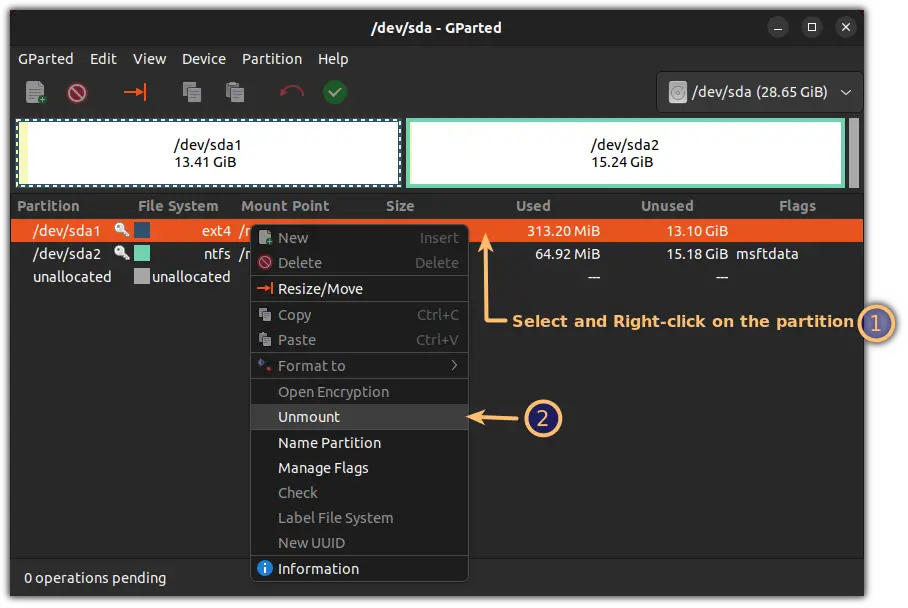
The first step is to unmount the drive as if the drive is mounted, system won't let you make any changes.
To unmount the drive, follow two simple steps:
- Select the partition
- Right-click and choose
Unmountfrom the context menu
Sounds confusing? Here's how you do it:
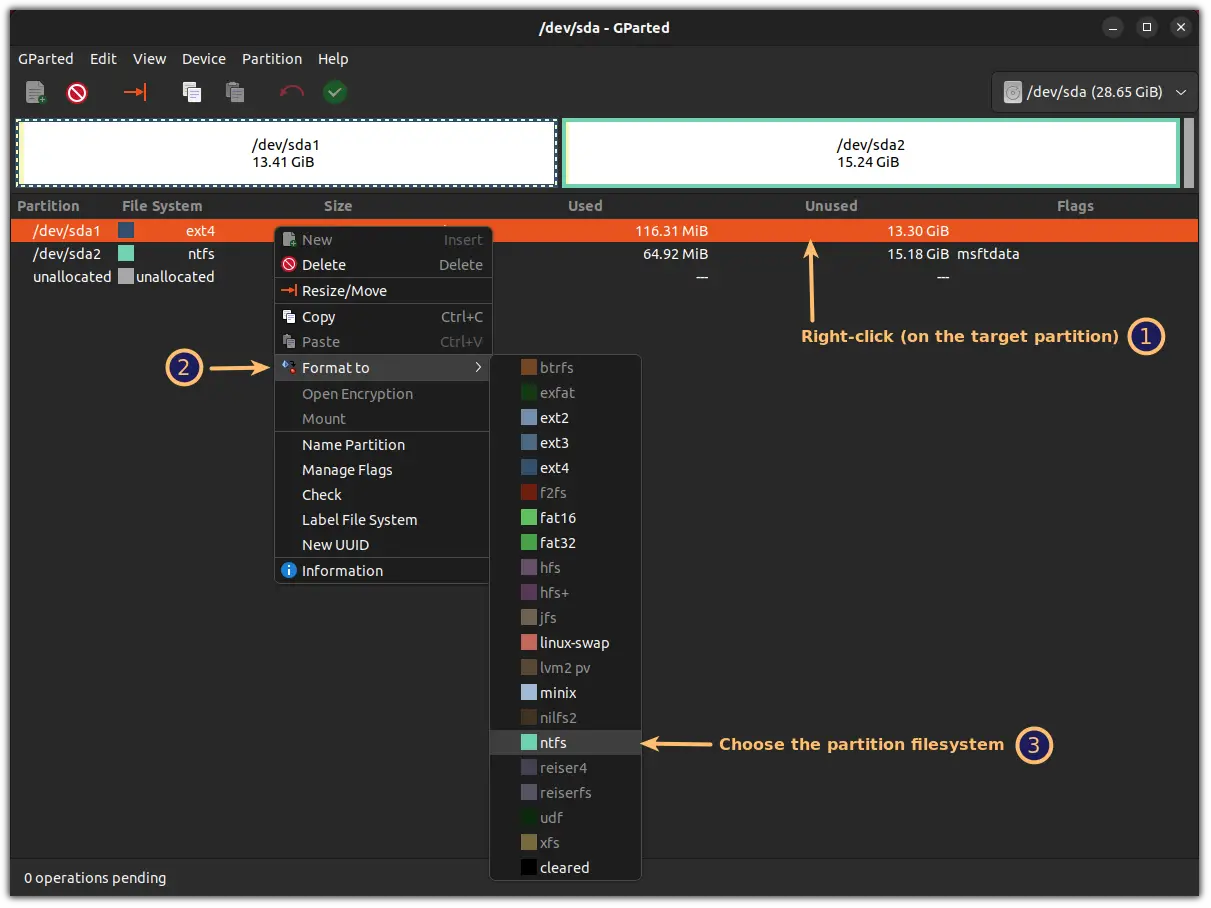
Once you unmount one or more partitions, select the target partition, right-click, and choose the Format to option and then select the filesystem type:
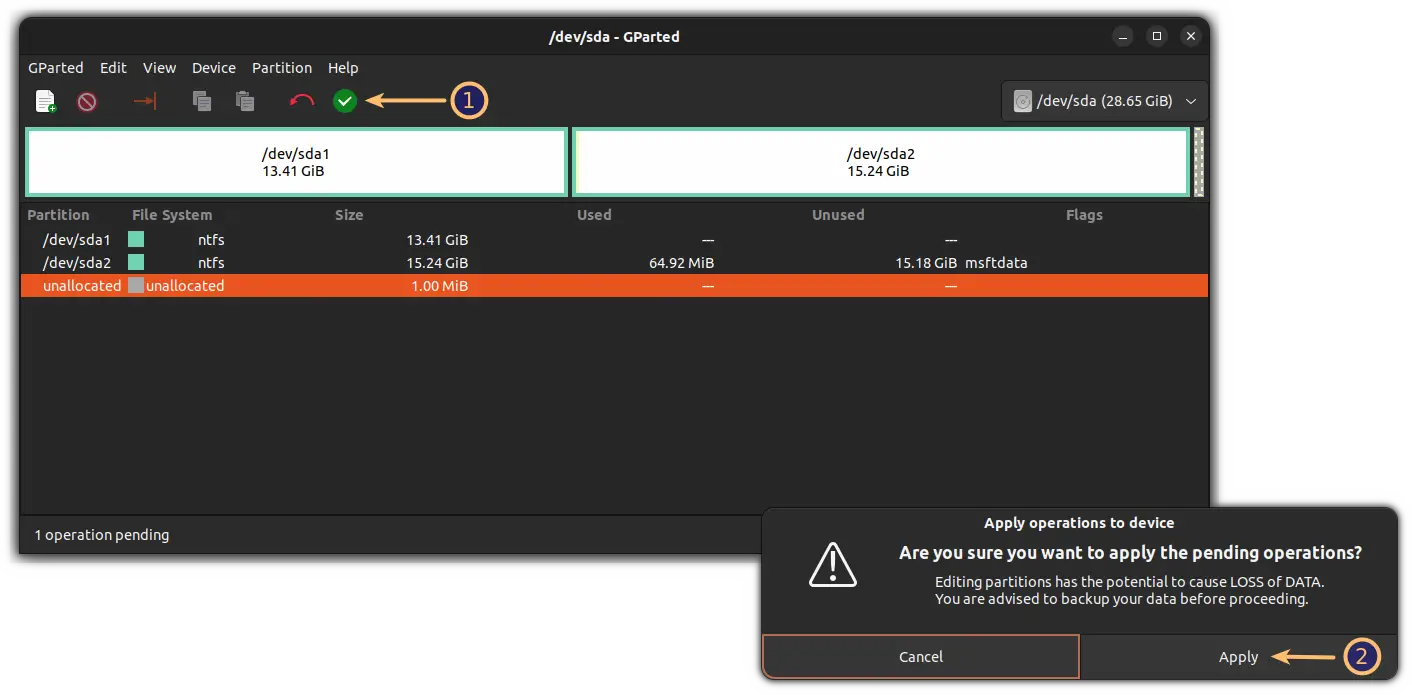
But that won't do it.
At the bottom, it will show 1 operation pending which indicates that the operation is yet to be performed with selected options.
To finish this operation, simply click on the check mark ✅ option and hit the Apply button:
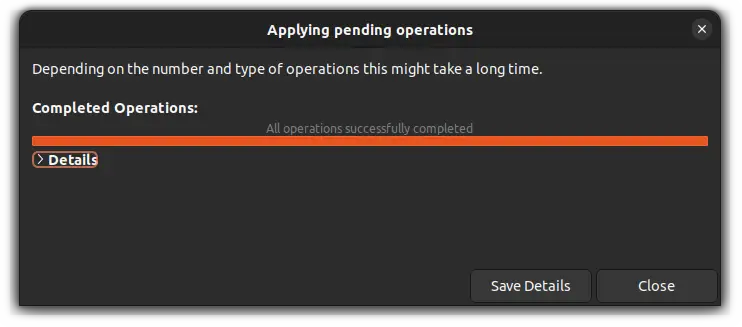
After successful completion of the operation, it will show you this message:
Resizing partitions
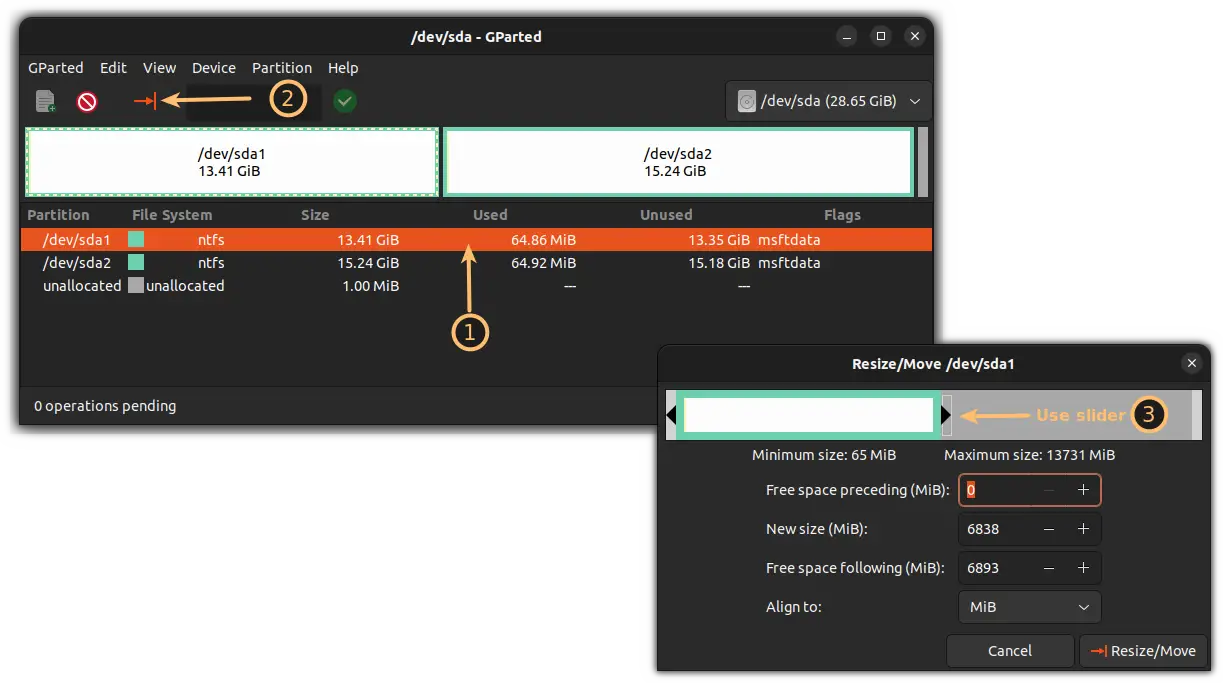
To resize the partition, all you have to do is follow two simple steps:
- Select the partition and click on the
Resizebutton. - You can either use the slider or specify the size manually to resize the partition.
For example, here, I resized my partition by half:
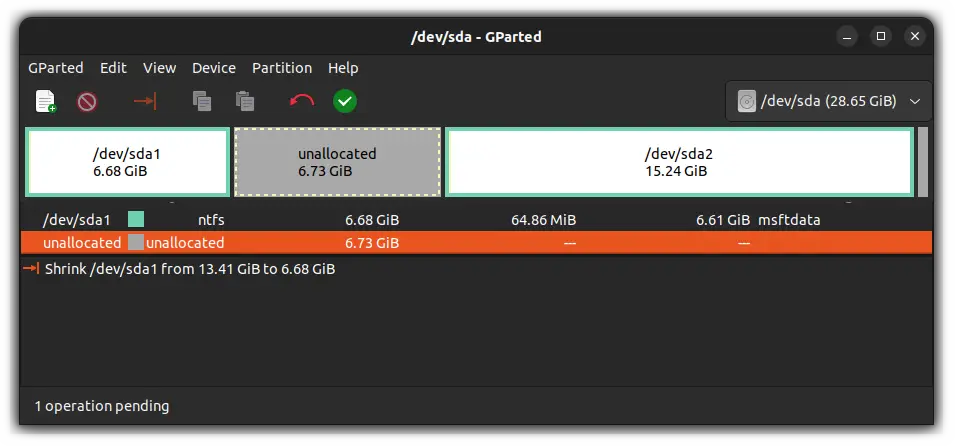
Once done, it will show you the unlocated space as you resized the partition:
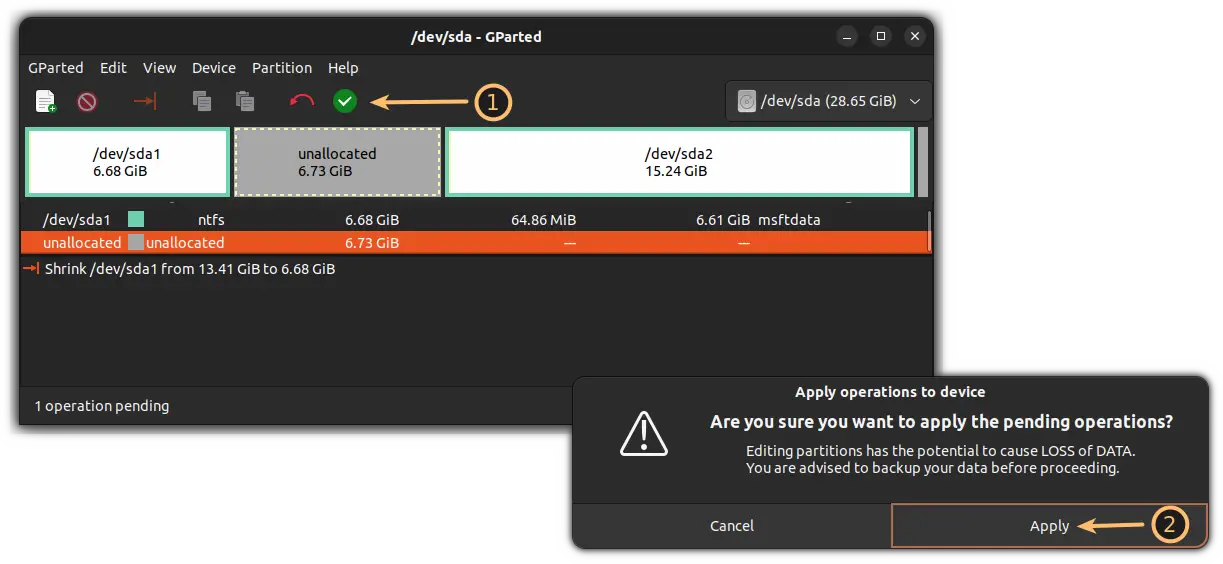
Finally, apply the actions by pressing the Apply all actions button followed by the Apply button from the warning prompt:
That's it!
Remove partition
While it may sound a little idiotic to remove the partition entirely think of a situation where you created a partition for a specific purpose and you no longer want it.
To remove the partition, first select the partition and click on the Delete the selected partition button:
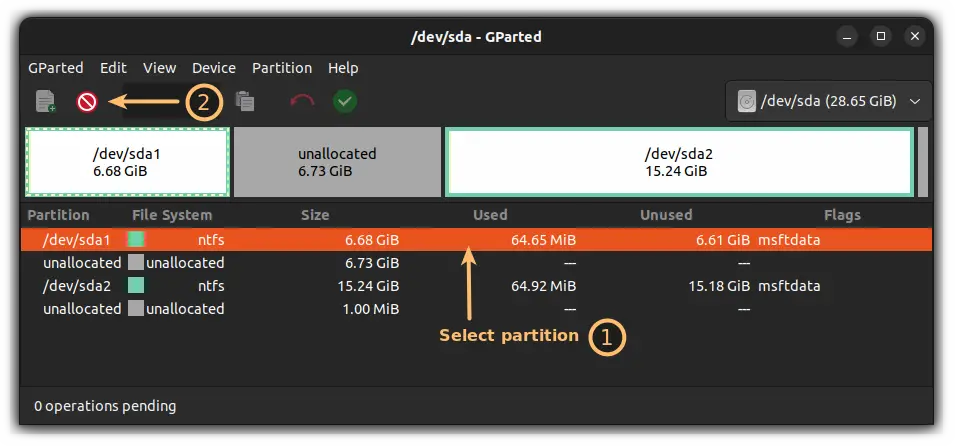
Once done, the size of the removed partition will be shown as unallocated space but as always, the task is undone.
To confirm the deletion of partition, press the Apply all actions button and then hit Apply:
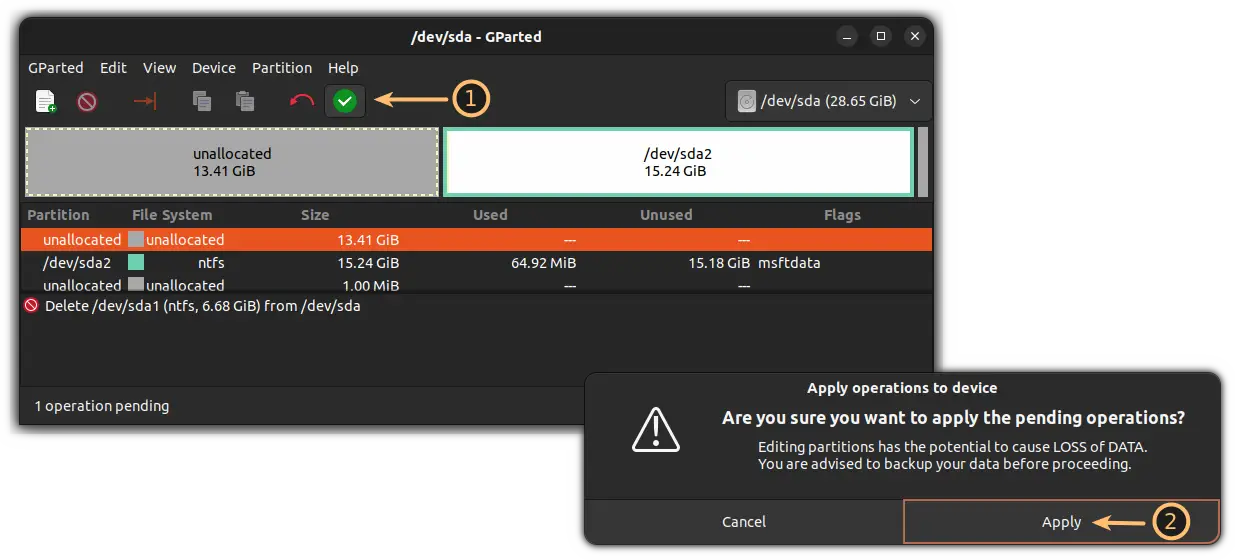
Yep, that's all it takes to remove the partition in GParted.
Wrapping Up...
This was a simple tutorial explaining how you can install GParted in Ubuntu including the basic use of it.
I hope this guide has helped you to install GParted and has helped you to learn the basics of it. If you still have any doubts, leave a comment.
A software engineer who loves to tinker with hardware till it gets crashed. While reviving my crashed system, you can find me reading literature, manga, or watering my plants.
