How to Install PostgreSQL on Ubuntu [Setup & Configurations]
Learn to install PostgreSQL on Ubuntu. Also learn how to set it up and configure it for the first use.
Being open-source, and supporting SQL and JSON querying is one of the crucial reasons why it is one of the most popular names when choosing a database management system.
And PostgreSQL is available in the default repository of Ubuntu.
While writing, I got PostgreSQL version 14.6 from the default repo.
So if the version is not the major concern, it can be installed using a single command:
sudo apt install postgresqlBut what if you want to have the most recent version? Well, that's what today's guide is all about.
Install the latest version of PostgreSQL on Ubuntu (if you need it)
To have the most recent version, you are required to utilize PostgreSQL's repository.
So first, create a repository configuration file using the following command:
sudo sh -c 'echo "deb http://apt.postgresql.org/pub/repos/apt $(lsb_release -cs)-pgdg main" > /etc/apt/sources.list.d/pgdg.list'Next, add the repository signing keys to have the authentic packages:
wget --quiet -O - https://www.postgresql.org/media/keys/ACCC4CF8.asc | sudo apt-key add -To take effect from the steps you made recently, update system repositories:
sudo apt update And finally, you can have the latest version of PostgreSQL:
sudo apt install postgresqlThe installed version of PostgreSQL can be retrieved from its shell prompt. So to start the prompt, use the following command:
sudo -u postgres psqlAnd now, execute the following command in PostgreSQL to check the installed version:
SELECT version();
How to configure PostgreSQL on Ubuntu
In this section, I will walk you through the two most basic configurations that you should do on your fresh PostgreSQL install:
- Changing password
- Allowing PostgreSQL to accept remote connections
So let me start with changing the password.
How to change user password in PostgreSQL
To change the password, first, connect to the PostgreSQL server that will get you to the PostgreSQL prompt:
sudo -u postgres psqlNow, you can follow the given command syntax to change the user password:
ALTER USER postgres PASSWORD 'Enter_password_here';For reference, I changed my password to Sagar@Learnubuntu:
ALTER USER postgres PASSWORD 'Sagar@Learnubuntu';
How to allow PostgreSQL to accept remote connections
In its default configuration, PostgreSQL can only be accessed via a loopback interface 127.0.0.1 on port 5432 and a UNIX socket.
So in simple words, you can only use PostgreSQL on the main machine where you have performed the installation.
Don't trust me? You can check the listing ports by yourself using the ss command:
ss -nlt
To use PostgreSQL remotely, you will have to make changes in postgresql.conf file.
But the location of that file might be different based on the version you are using. And to find the exact location postgresql.conf file, use:
sudo find / -name "postgresql.conf" 2>/dev/null
Here, I have redirected the errors to the /dev/null.
You can learn more about how you can redirect standard input, output, and errors by the given guide:

Once you find the exact location of the postgresql.conf, you can open that file using any of your preferred text editors.
Here, I'm going with nano:
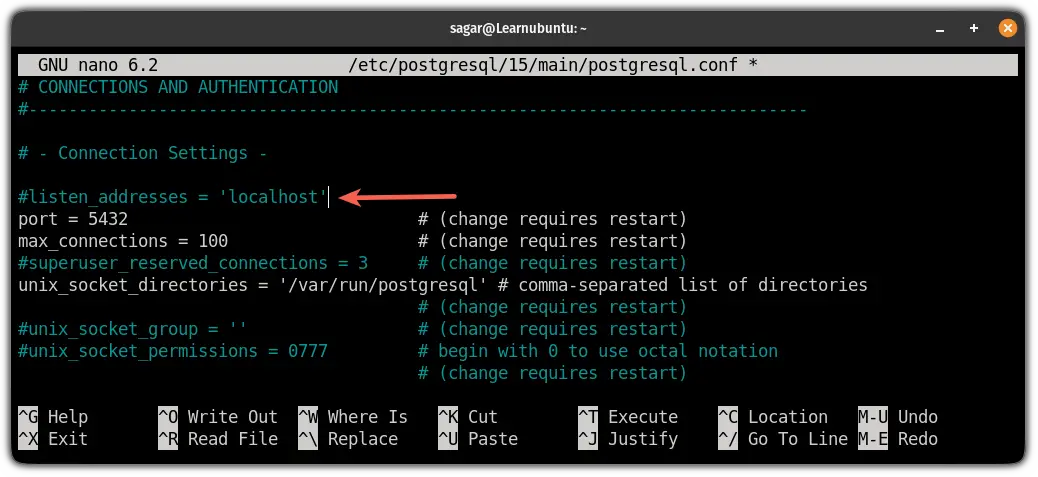
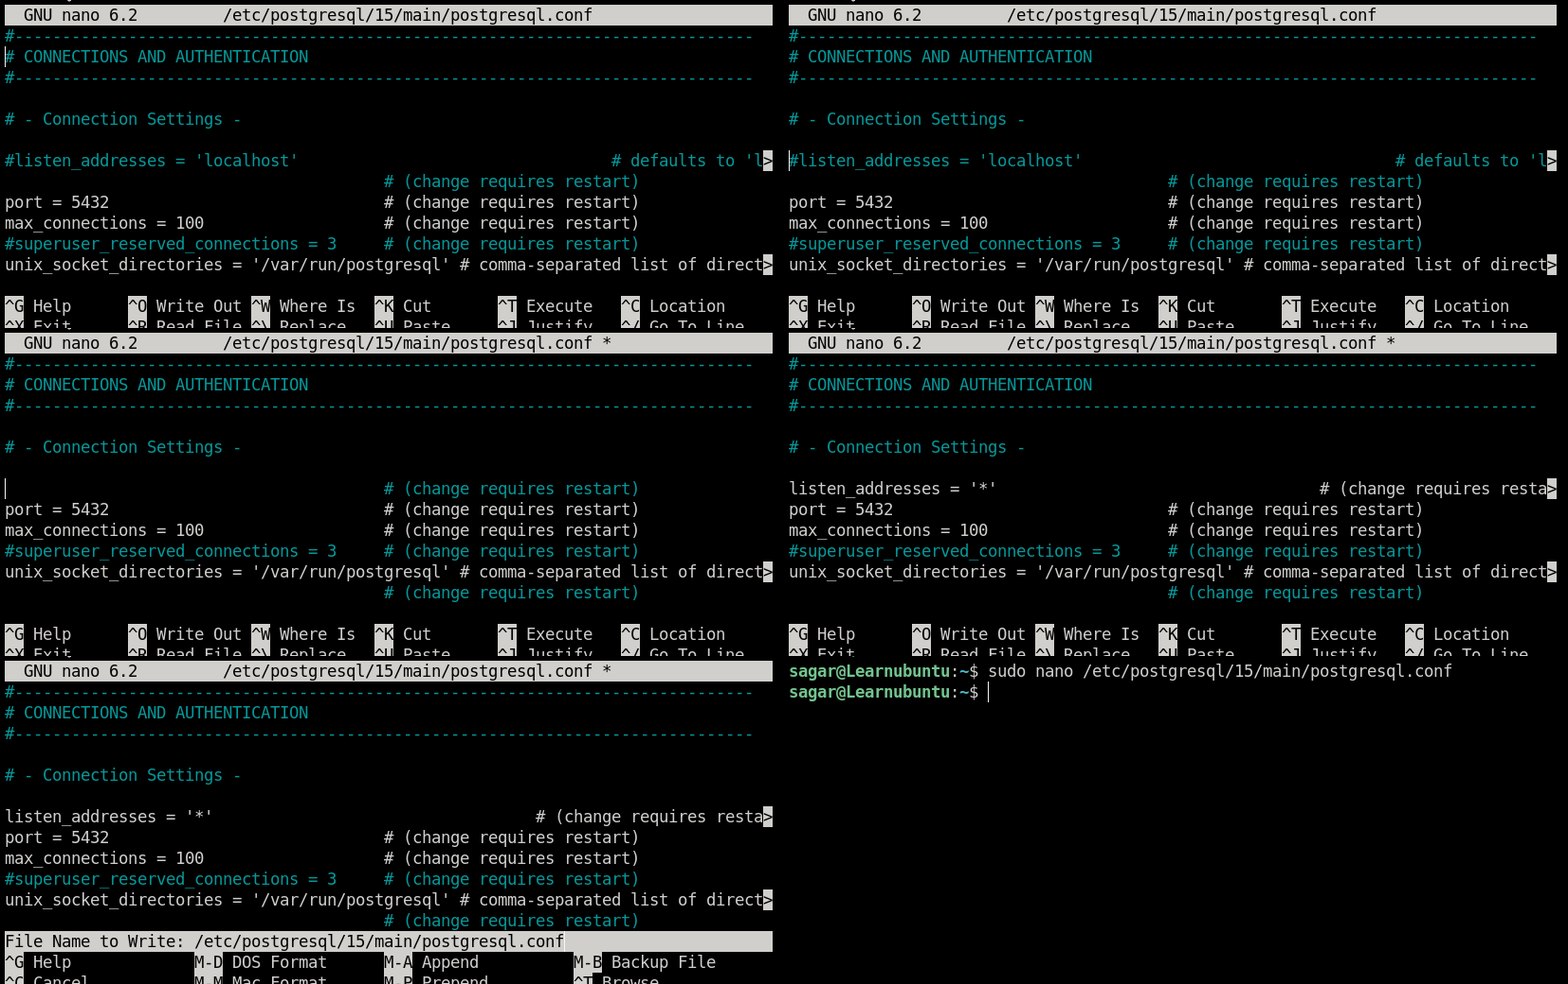
sudo nano /etc/postgresql/15/main/postgresql.confIn this config file, under the CONNECTIONS AND AUTHENTICATION section, you will find the following line:
#listen_addresses = 'localhost' 
Which needs to be replaced with:
listen_addresses = '*' 
Save changes and exit from the nano text editor.
To benefit from the configuration, restart the PostgreSQL:
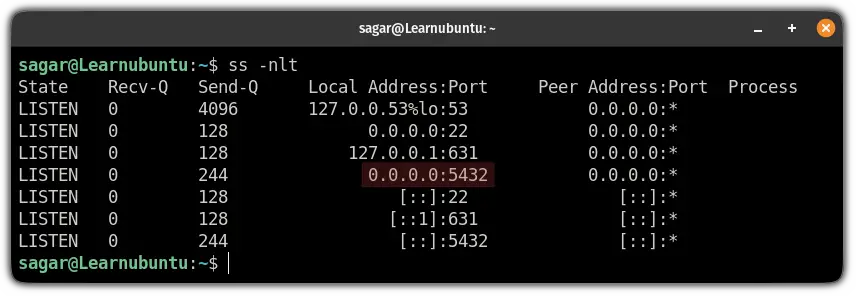
sudo systemctl restart postgresqlAnd now, if you will use the ss command to list listening ports, you will find that PostgreSQL is listening on all interfaces:
ss -nlt
However, if you will try to use PostgreSQL remotely, it will throw the following error:

To allow the remote connections, you will have to make changes in pg_hba.conf file.
And to know its exact path, use the following command:
sudo find / -name "pg_hba.conf" 2>/dev/null
Once you find the location of the pg_hba.conf file, open it using your preferred text editor. Here, I'm going with the nano:
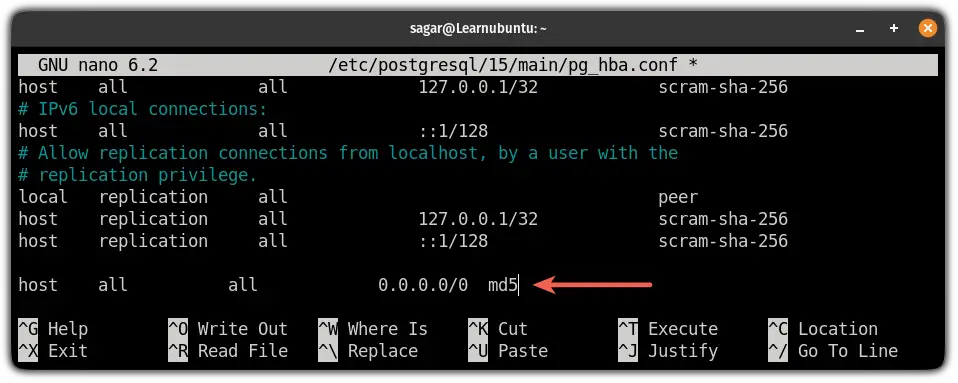
sudo nano /etc/postgresql/15/main/pg_hba.confAdd the following line at the end of this config file:
host all all 0.0.0.0/0 md5
Save changes and restart the PostgreSQL:
sudo systemctl restart postgresqlNow, let's connect from the client's machine
How to access PostgreSQL from the remote system
To access PostgreSQL on the remote machine, you'd have to install the PostgreSQL client on that system:
sudo apt-get install postgresql-clientOnce done, you can access PostgreSQL from your system using the following command syntax:
psql -h [IP_of_host] -U postgres
Once you execute the above command, it will ask for the password.
Remember I started the configuration part with the password? You will have to enter that passphrase here.
Wrapping Up
This was a short tutorial on how you can install the latest version of PostgreSQL on Ubuntu.
I hope this guide will solve the query you had before coming to us.
And if you have any queries, let me know in the comments.
A software engineer who loves to tinker with hardware till it gets crashed. While reviving my crashed system, you can find me reading literature, manga, or watering my plants.

