How to Install and Use Traceroute on Ubuntu
Learn what traceroute is, how to install it in Ubuntu and some practical examples of using this networking command.

While troubleshooting a network, want more detailed information than what ping offers but in the same simple manner?
Well, that's what traceroute offers! It will trace the entire route to the destination.
But before going to the installation part, it is essential to know how traceroute is different from ping and how it works.
How does traceroute work?
The Internet is nothing but a global network of routers and the traceroute utility is used to find out the exact path taken by a packet to reach the destination.
When you execute the traceroute command with any IP or domain name, your system will send 3 data packets to each router that serves as a path to your destination.
Once 3 data packets reach the router, the router will send back those packets and also give us some useful information such as the IP of each router and the round trip time of each packet.
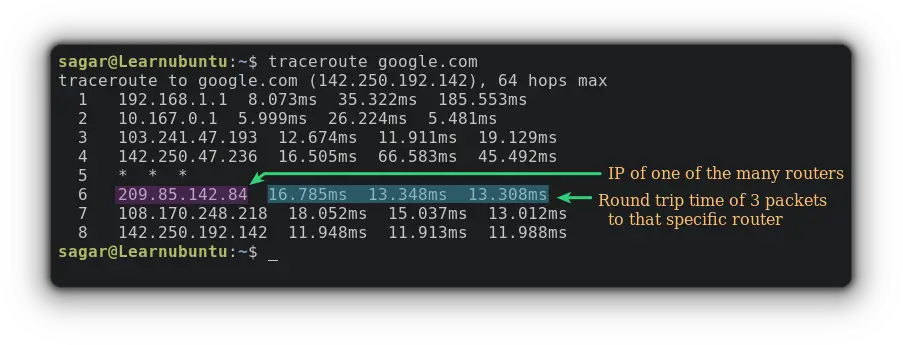
So when I used the traceroute command over google, it went through 8 routers and one of them was not responding (5th one, marked with *).
And ping serves an entirely different purpose. It will only inform you whether packets are being sent and received to the destination.
How to install traceroute in Ubuntu
traceroute is one of the most popular networking commands in Linux. It can be found in almost every package manager and Ubuntu is no different. This means a single command will get the job done.
sudo apt install tracerouteNow, you just have to append IP or domain name with the traceroute command. Yes, it's that easy!
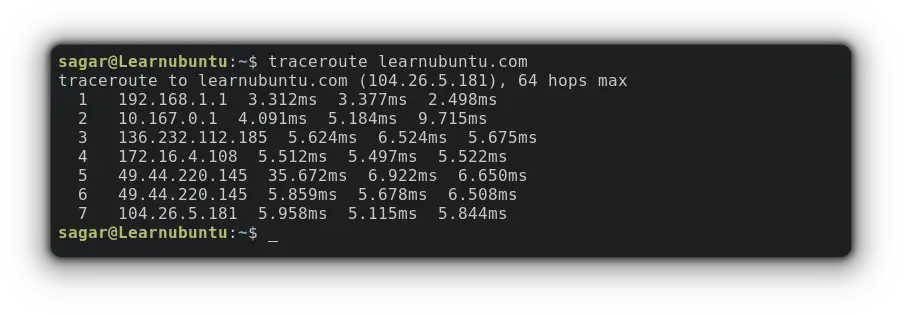
But that was the default behavior. The traceroute utility has various options to match your needs. So let's have a look at some examples.

Using traceroute command
There could be a number of examples of using the traceroute command. Here are a few useful and easy ones I could think of.
1. Change the default number of packets being sent/received
As I mentioned earlier, the traceroute will send three packets, but you can change this behavior by using -q option.
For example, let's change the number of packets to 5:
traceroute -q 5 google.com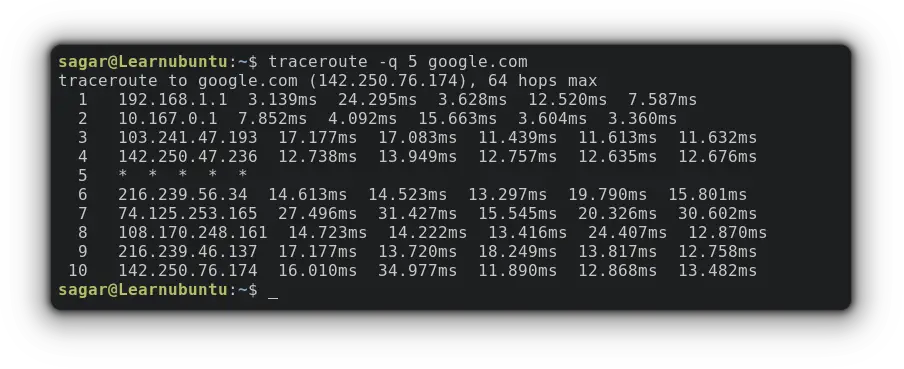
2. Resolve hostnames with IP
The traceroute utility won't show the hostname of the router by default and if you want to know the hostname of the router by which packets are being passed, just use --resolve-hostnames option.
traceroute --resolve-hostnames google.com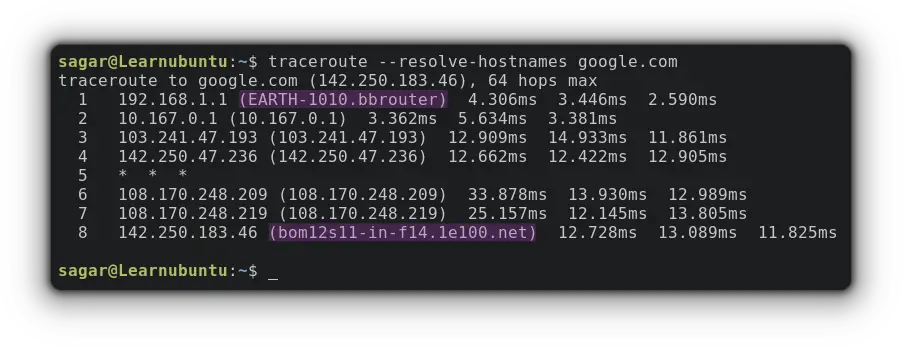
Yep, it is not necessary that each router would have a hostname.
3. Configure response time
Being extremely customizable, traceroute also allows you to configure response time (default is 3) in between packets by using -w option.
For example, let's set it for 1 second:
traceroute -w 1 google.com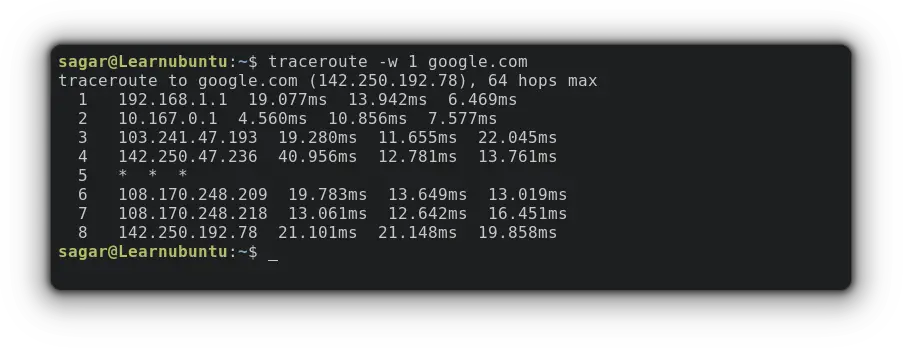
4. Route packages through the gateway
If you want to use the gateway for some reason, it can easily be done by using -g option with gateway address and domain.
For example, I want to use 192.168.0.1 as a gateway so my command would be:
traceroute -g 192.168.0.1 google.com
5. Change destination port
The default destination port used by traceroute is 33434 which can be easily tweaked by -p option.
For example, let's change it to 30287 to traceroute google.
traceroute -p 30287 google.com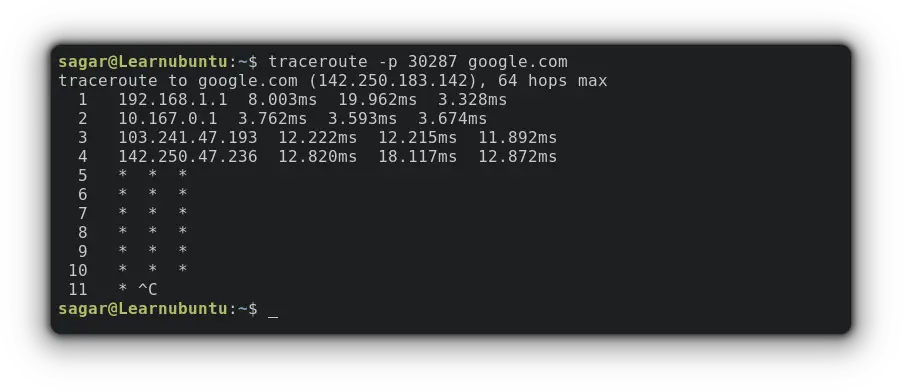
6. Set maximum hop count
By default, traceroute can go up to 64 hops which can be annoying sometimes. But you can change this by using -m option.
Let's say I want to change the default hops to 5, so my command will be:
traceroute -m 6 google.com
Conclusion
Traceroute can be helpful when you're required to find latency at specific routing points and any networking geek can relate to the pain of having high latency. Am I right?
A software engineer who loves to tinker with hardware till it gets crashed. While reviving my crashed system, you can find me reading literature, manga, or watering my plants.

