Unzip Files in Ubuntu Command Line
Got a zipped file? Learn how to extract a zipped file using the unzip command in the Ubuntu command line.

Got yourself a zipped file?
Extracting a zip file could seem like a challenge if you are stuck to the terminal but it is not really.
All you have to do is to use the unzip command like this:
unzip file.zipIt will extract the contents of the zipped file in the current location. Sometime you don't want that. You may want to unzip the file contents into its own folder. For that use:
unzip -d directory_name file.zipIf the directory doesn't exist already, it will create it first and then extract the contents of the file.zip into it.
Actually, there is more to the unzip command. Let me discuss it in a bit more detail here.
How to unzip files in Ubuntu
Unzip it comes pre-installed in most Linux distributions.
But if you are running a minimal server, it will throw an error saying "Command 'unzip' not found":

And in that case, it can be installed using:
sudo apt install unzipOnce you are done with the installation, you can refer to the given command syntax to use the unzip files:
unzip [options] Compressed_fileNow, let's jump to the examples.
1. How to unzip files in Ubuntu
To unzip the file, all you have to do is append the filename to the unzip command:
unzip Compressed_fileFor example, here, I want to unzip a file named Fedora-ISO.zip, so I will be following the given command:
unzip Fedora-ISO.zip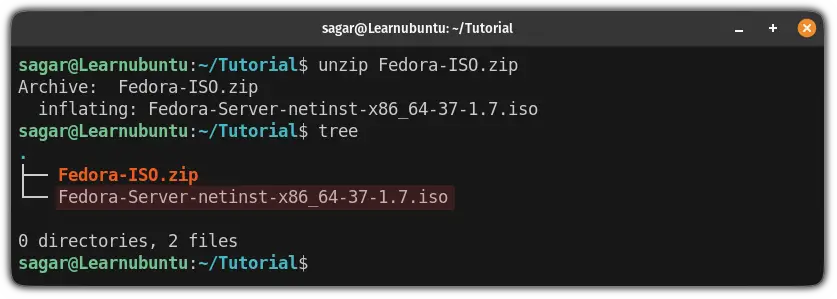
Here I have used the tree command to list the contents of the directory and as you can see, the file has been unzipped successfully.
2. Unzip a password-protected file in Ubuntu
Creating a password-protected zip file in Linux is quite easy but what about decompressing it?
There are two ways to tackle this situation:
- Appending password while executing command itself (not recommended).
- Entering password in command prompt without visibility (similar to entering a password for sudo).
So let's start with the recommended way.
Unzip password-protected files securely
The syntax will remain the same as unzipping a normal file and later on, you are asked to enter the password:
unzip compressed_file.zipFor example, here, I want to unzip a file named Fedora_protected.zip, so I will execute the following:
unzip Fedora_protected.zip
As you can see, after the command execution, it will ask for the passphrase and once you enter the correct one, you will have your file unzipped!
Appending password key to command itself
To append the decryption key, all you have to do is follow the given command syntax:
unzip -P your-password compressed_file.zipFor example, here, I want to unzip a file named Fedora_protected.zip and my password is pass123:
unzip -P pass123 Fedora_protected.zip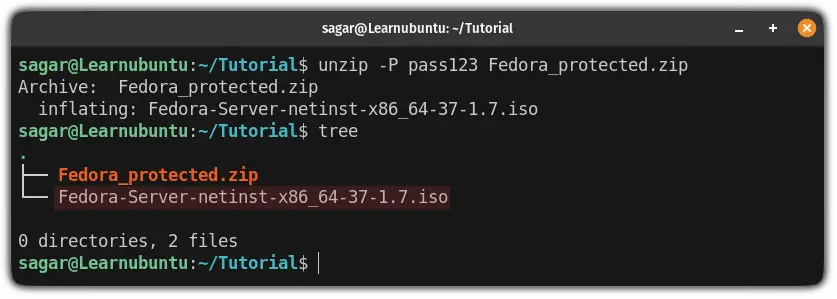
3. Unzip the file to a different directory
If you notice, in all examples that I gave above, the unzip command will extract the files in the current working directory.
And you may not want that always so in case, you can specify the directory name using the -d flag:
unzip -d /path/to/directory compressed_file.zipSo let's say I want to extract my files to the Downloads directory, then I will be using the following:
unzip -d ~/Downloads/ Fedora-ISO.zip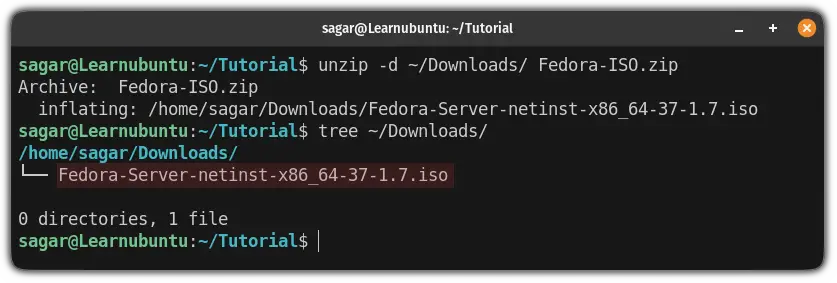
4. Check the contents of the zip file without extracting
You can list the contents of a zip file so that you can be assured of its contents before proceeding with decompression.
To list the contents of a zip file, all you have to do is append the filename with the -l flag:
unzip -l compressed_file.zip
5. Exclude files while unzipping files
In the majority of cases, you will have multiple files inside a zip file and you may not want all the files.
To exclude files, all you have to do is append their filenames with the -x flag:
unzip compressed_file.zip -x file_to_excludeIn my case, there are two ISO files in my zip file:
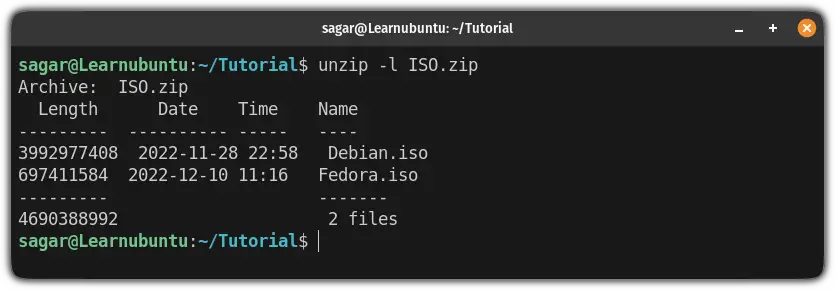
From this, I want to exclude the Fedora.iso file so I will be using the following command:
unzip ISO.zip -x Fedora.iso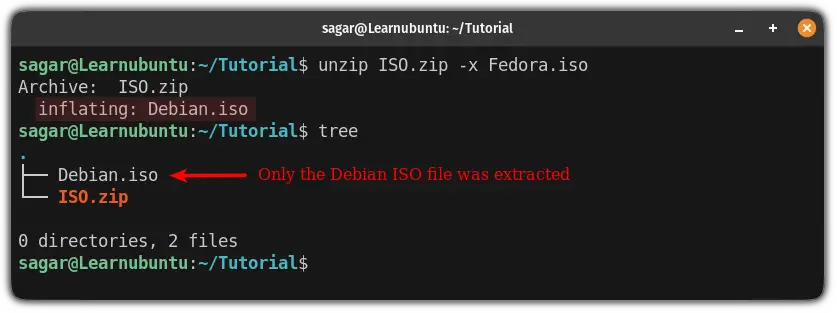
And as you can see, it only extracted the Debian.iso file as I excluded the Fedora.iso file.
6. Override the existing files while unzipping
While unzipping, if there is already a file available with exact same name, it will ask you whether you replace the file:

Which is not the most convenient way. And in that case, you can override the existing file using the -o flag:
unzip -o Compressed_file.zipFor example, I will be using the same file that I used above (ISO.zip):
unzip -o ISO.zip
And as you can see, it didn't ask any questions this time.
Did you know the difference between Tar Vs Zip Vs Gz?
While most users tend to compress, extract and use whatever is given to them.
But do you know the actual difference between Tar Vs Zip Vs Gz in terms of efficiency? If not, here's a detailed guide for that:

I hope you will find this guide helpful and if you have any queries or suggestions related to what should I cover next, let me know in the comments.
A software engineer who loves to tinker with hardware till it gets crashed. While reviving my crashed system, you can find me reading literature, manga, or watering my plants.

