Install and Use 7zip in Ubuntu Command Line
Learn how to install 7zip file support on Ubuntu and how to use the 7z command line utility.

While downloading files from the internet, you may end up getting a file with .7z extension.
To extract those files, you must have 7zip installed and some basic knowledge of how to deal with those files.
In this tutorial, I will show you how to install 7zip with some examples.
How to install 7zip on Ubuntu
The 7zip package is available in the universal repository for installation.
Normally, you already have this repo enabled. If not, learn how you can enable the universe and multiverse repository on Ubuntu.
Use the following command to perform the installation:
sudo apt install p7zip-full p7zip-rarThat's it! You have 7zip installed on your system.
Now let's have a look at how you can use it.
How to use 7zip on Ubuntu
In this section, I will be covering how you can use various features of 7zip like:
- Compression
- Extraction
- Password-protecting file
- Add files to an existing archive
And more. So let's start with the first one.
How to compress files using 7zip
To compress files, you have to execute the command in the following command syntax:
7z a [archive name] [file]For example, here, I created an archive named Images.7z which contains 2 images:
7z a Images.7z Image.jpeg Image2.jpeg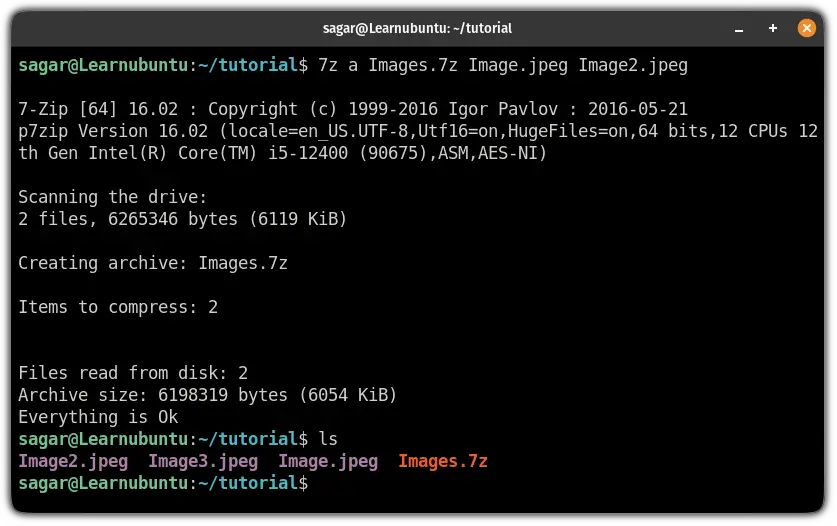
How to compress a directory using 7zip
You can compress a directory with a slight change in the above command.
All you have to do is enter the name of the directory or the path to the directory instead of the name of the file:
7z a [archive_name] [Directory_Name]For example, here, I compressed the tutorial directory and named the archive as a Tutorial.7z:
7z a Tutorial.7z tutorial/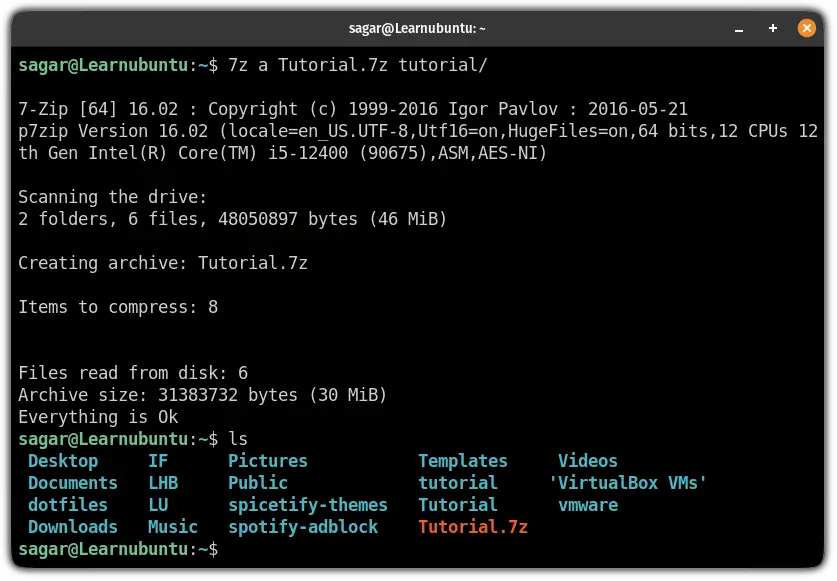
How to check the details of the archive
Once you learn how you can create an archive, you may also want to know what are the file contents of that archive.
This can easily be done using the following command syntax:
7z l [archive_name]
How to decompress 7zip archive on Ubuntu
To extract files from the archive, all you have to do is append the archive name with the e option to the 7z command:
7z e [archive_name]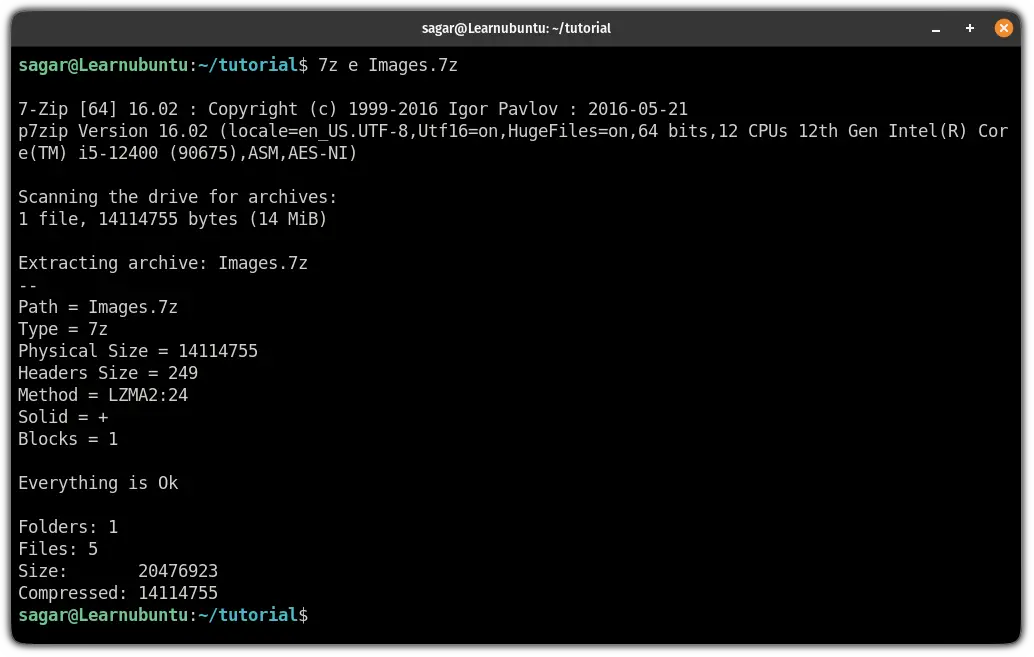
Press N to not replace the existing file and you will have your archive intact!
But it will extract every file in the current working directory:
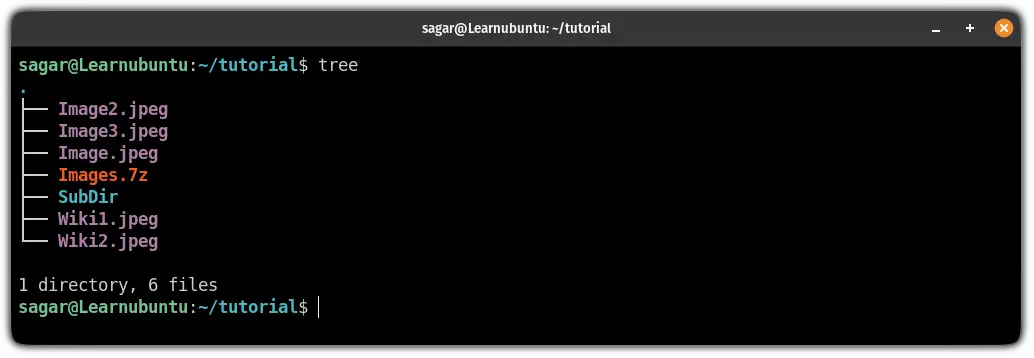
So if you want to extract files with the exact path, use the x flag instead of e:
7z x [archive_name]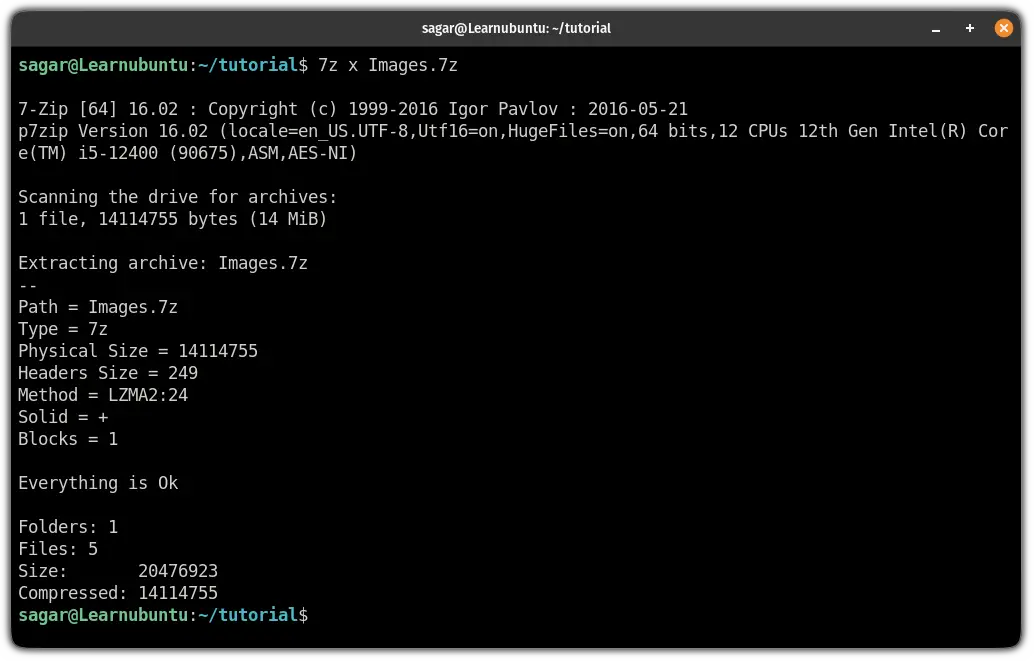
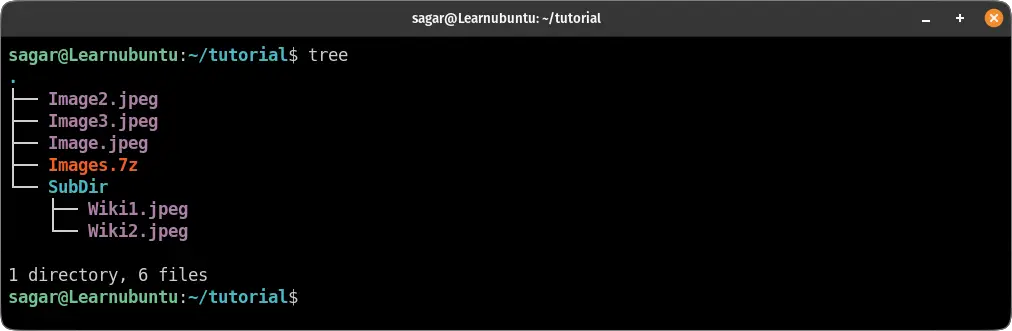
And now, if you use the tree command to check the file contents, you will have files extracted with the exact path:
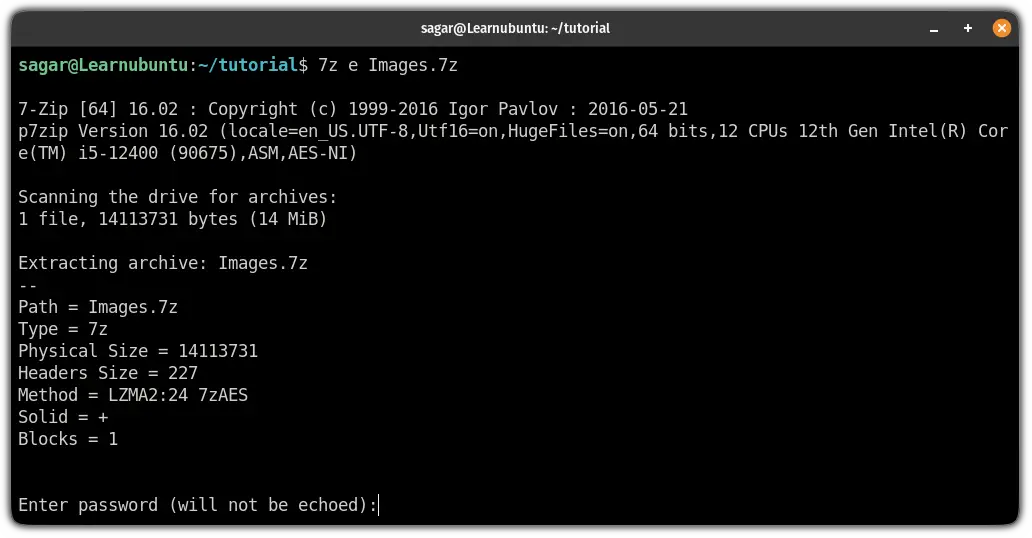
How to password protect archive using 7zip on Ubuntu
To password-protect the archive, you will have to append the password to the -p flag while making the archive file.
Here's the syntax to password-protect archive:
7z a [archive_name] -p[password] [file/directory_to_archive]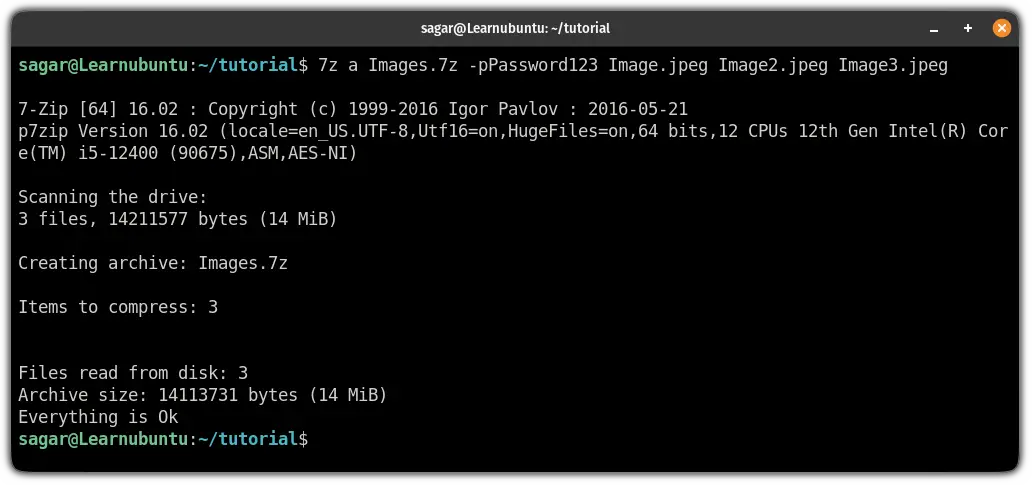
Here, I used Password123 as the passphrase to access the archive.
And when I tried decompressing the file, it asked me for the password to proceed further:
How to add files to the existing 7zip archive on Ubuntu
To add a new file to the existing archive, execute the command in the following syntax:
7z u [archive_name] [Filename]Here, I want to add Image3.jpeg to the existing archive Images.7z so I will be using the following command:
7z u Images.7z Image3.jpeg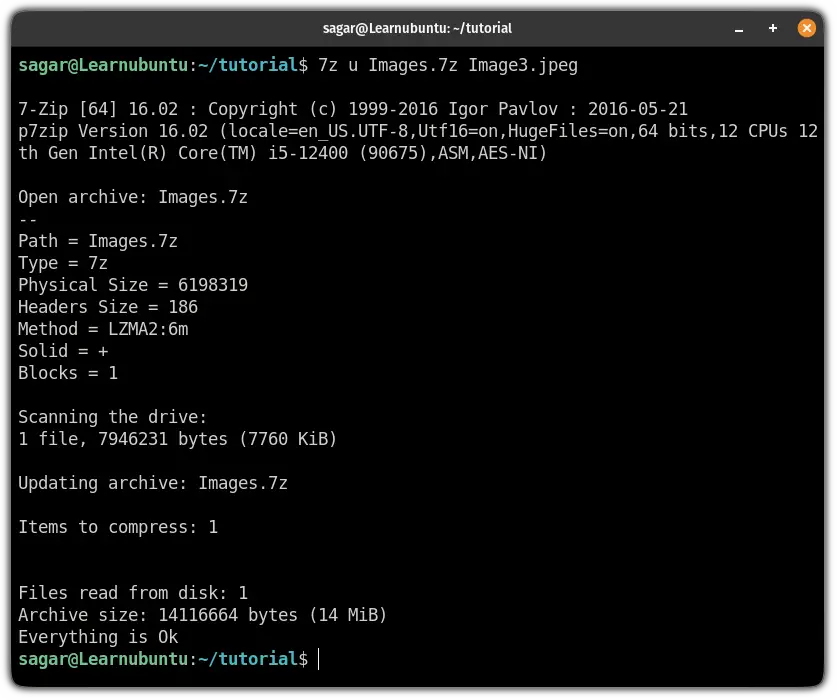
How to remove files from the existing 7zip archive on Ubuntu
To remove the file from the archive, you will have to execute the command in the following syntax:
7z d [archive_name] [Filename]For example, here, I removed an Image.jpeg file from the Images.7z archive:
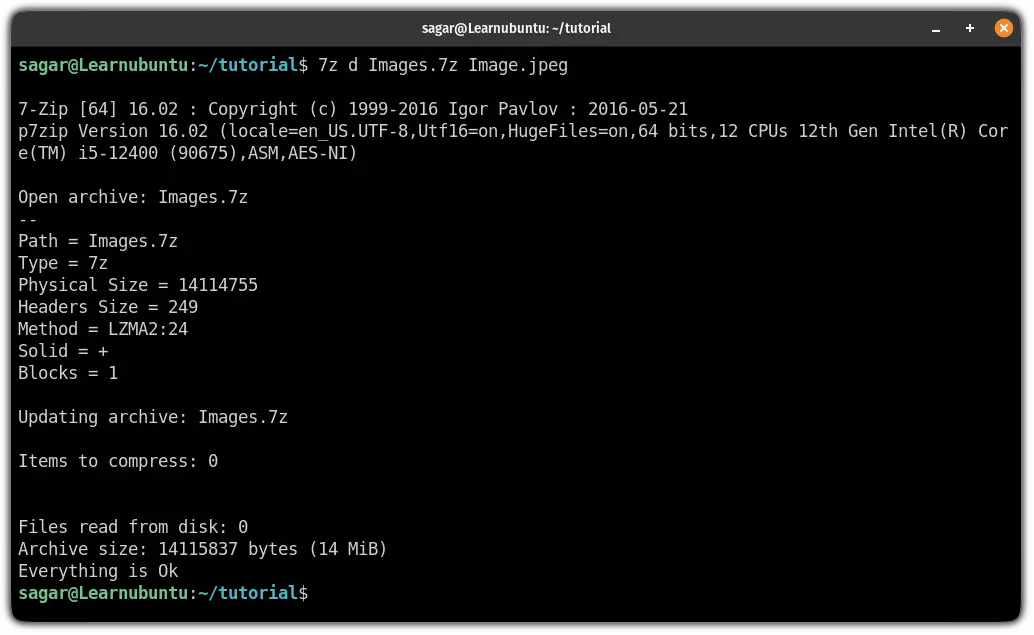
To verify whether the file was removed successfully or not, check the details of the archive:
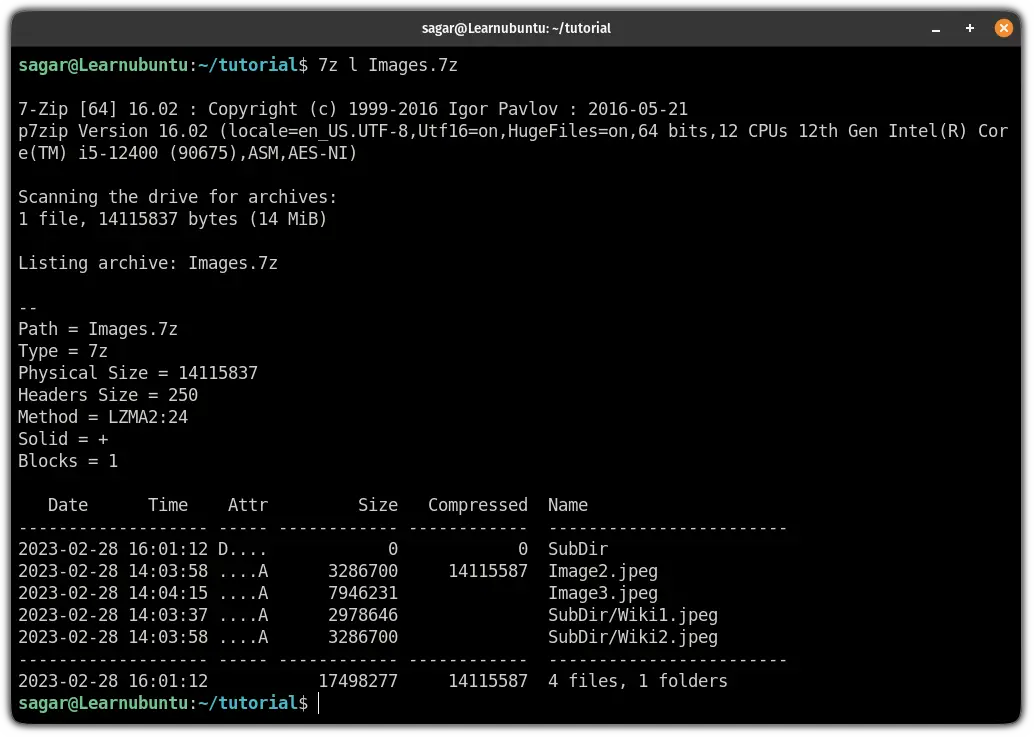
And as you can see, the file was removed successfully!
Have multiple zip files? Learn to unzip them
If you have multiple zip files, you can use the unzip command to decompress them.
And for that purpose, we have a dedicated tutorial:

I hope you will find this guide helpful.
And if you have any queries, let me know in the comments.

A software engineer who loves to tinker with hardware till it gets crashed. While reviving my crashed system, you can find me reading literature, manga, or watering my plants.