How to Install and Use Curl on Ubuntu
Curl not found? Before you use it, Curl needs to be installed first. Here's how to install Curl on Ubuntu and use it for downloading files.

You went on following one of our tutorials involving the use of Curl the chances of you might end up getting an error something like this:
Command 'curl' not found. but can be installed with
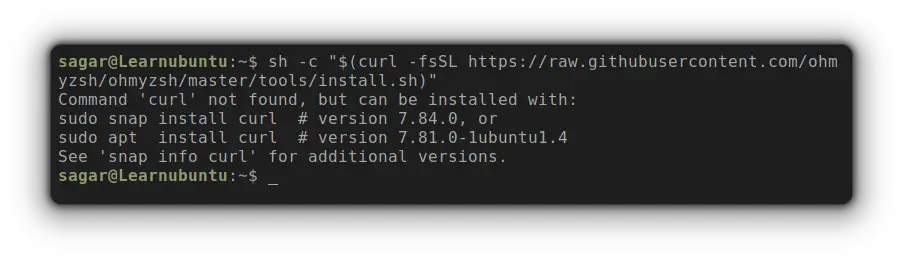
The above command involved the usage of curl for installing Oh My Zsh to configure Zsh in Ubuntu. So what should be the next step?
Well, I'm here to show you the quick way of installing Curl with some basic use cases to empower your Linux journey!!
Install Curl Using apt in Ubuntu
Well, this is what I prefer as snaps are not what I prefer the most. And utilizing the default repository for installing packages is a convenient way to manage packages in an easy way!
So a single command as always and you'd be good to go:
sudo apt install curlAnd to check the installed version, you just have to pair curl with --version as given:
curl --version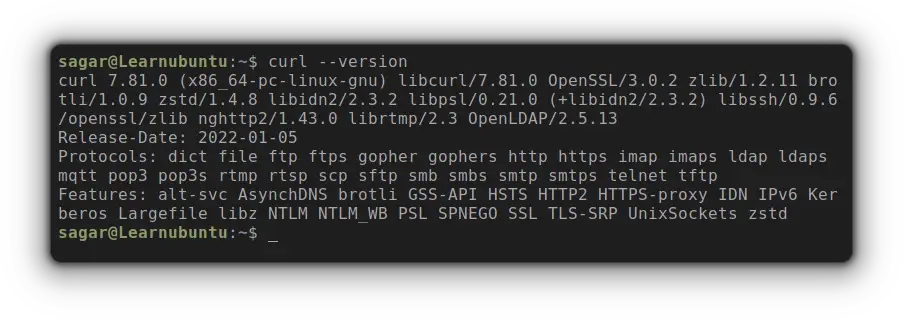
And here you have it!
Install Curl as a Snap Package
Well, if you're dealing with servers with no GUI involved, there's where the snaps shine and I love running them over my remote machines.
Also, snaps are going to get you a newer version of the package compared to what the default repository offers.
So if you want to utilize snap to install curl, Its as simple as the given command:
sudo snap install curl
As you can see, it got me to curl version 7.84 which is 3-point releases ahead of what UI got using apt.
Use Curl in Ubuntu
This section is only going to cover some basics examples of Curl and if you're curious to learn more advanced use cases, I'd recommend checking out the other guide:

You'd often see curl involved in downloading packages but do you know that it was created in such a way that it won't require any user interaction to work!!
So let's start with downloading files.
Download Files Using Curl
Well, the basic syntax for downloading any file is to pair curl command with the -O option and destination link:
curl -O Destination_Link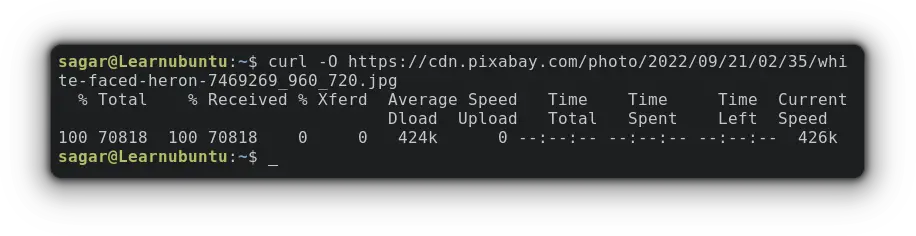
Yep, it is that easy.
Download the File with Custom Name
Well, the default file names of downloaded files are generally long and I tend to rename after them once they are done being downloaded.
And curl will save you from this headache as you can specify the filename at the time of command execution.
curl -o Custom_FileName Download_LinkSo for example, I renamed the jpg file here:
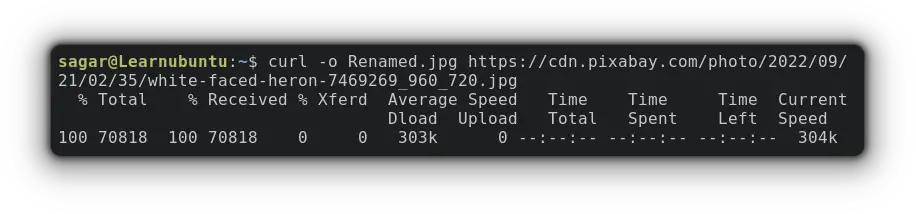
Make sure to use -o in lowercase.
Resume Download using Curl
There are many factors that may interrupt the download process and you can resume download with the help of -C - option.
curl -C - O PreviousDownloadURL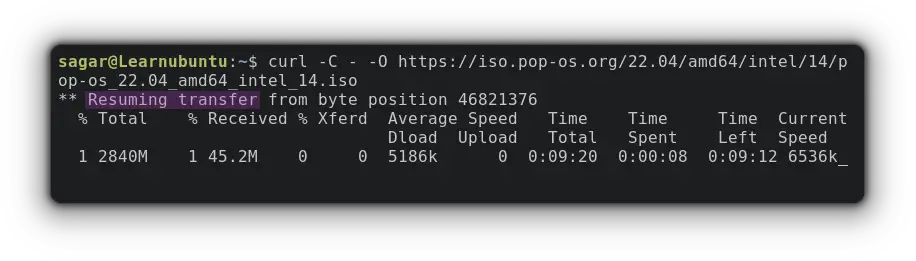
Check Connectivity to Server using Curl
I know there are various networking commands to troubleshoot networking issues but curl can also be used to get your job done.
It will return the HTML code of a specified site if it's working fine. And it is quite easy too.
Just pair the URL with curl and that's it:
curl URL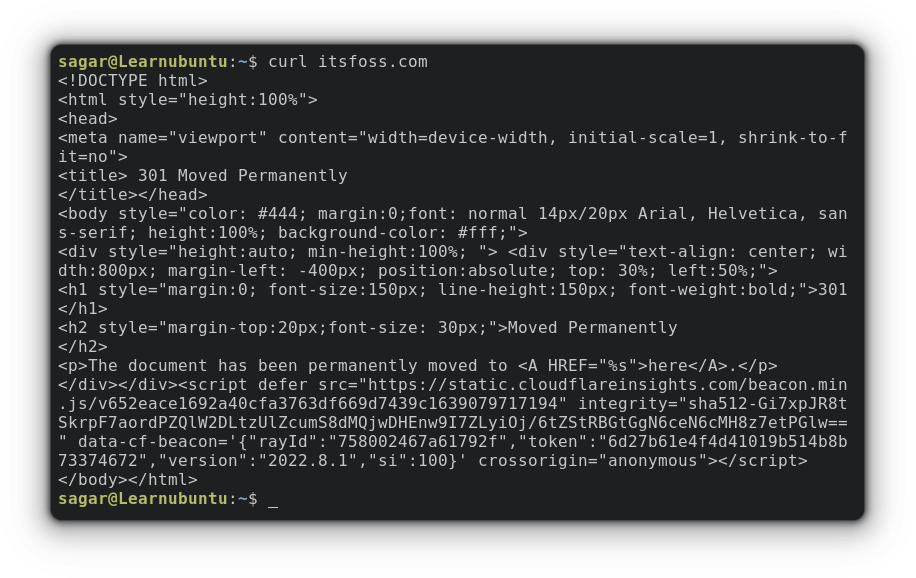
Wrapping Up
In this guide, I explained how you could install curl in Ubuntu by snap and default package manager and also included some basic examples to get you started with it.
And if you have any doubts, feel free to ask in the comments!!

A software engineer who loves to tinker with hardware till it gets crashed. While reviving my crashed system, you can find me reading literature, manga, or watering my plants.