Install Java in Ubuntu
Learn to properly install Java on Ubuntu Linux using the terminal in this beginner's tutorial.

Java is one of the most robust programming languages for developing websites, games, Android, and desktop apps.
And to check whether java is already installed on your system, you can use the following:
java --versionAnd if it comes up with any version number, you have it already installed, and if it shows an error saying Command 'java' not found, here you have various ways to java on Ubuntu.
How to Install Java in Ubuntu
There are two ways to install Java in Ubuntu:
- Using the JDK package
- Using JRE package
The JDK packages contain every essential package that the user needs to run a java application.
Whereas the JRE has some additional tools to facilitate the development process.
One thing to remember is that JDK has an Oracle version used for commercial purposes.
Although there are no significant differences between Oracle JDK and OpenJDK, Oracle JDK offers higher performance and responsiveness.
Oracle JDK mainly focuses on stability, best suited for enterprise purposes.
To install JDK:
So if you want the JDK package, all you have to do is execute the following command:
sudo apt update && sudo apt install default-jdkOnce you are done with the installation, you can check the installed version of java to verify the installation:
java --versionprateek@Learnubuntu:~$ java --version
openjdk 11.0.18 2023-01-17
OpenJDK Runtime Environment (build 11.0.18+10-post-Ubuntu-0ubuntu122.04)
OpenJDK 64-Bit Server VM (build 11.0.18+10-post-Ubuntu-0ubuntu122.04, mixed mode, sharing)To install Open JRE (optional):
So if you are into software development, installing JRE can come in handy.
To install JRE, all you have to do is execute the following command:
sudo apt install default-jreInstall Specific Version of Java
The default repository allows you to choose from various versions of JDK and JRE so if your workflow demands a different version, here you have it.
To list available versions of java, use the following command:
apt list OpenJDK\*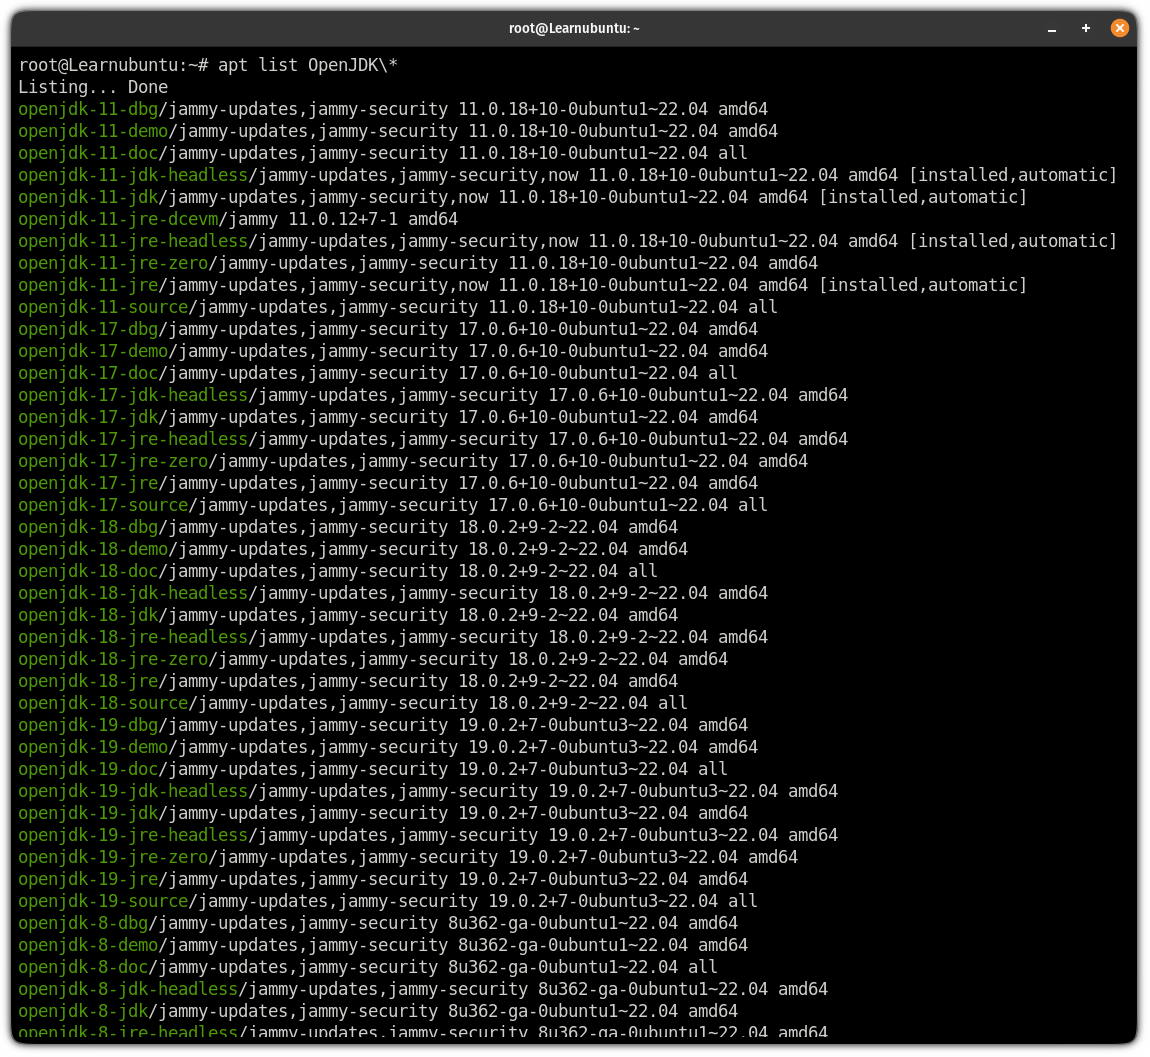
Here, I will walk you through how you can install a specific version of both JDK and JRE.
Will start with the JDK.
To install the specific version of JDK on Ubuntu
So if you want to install a specific version of JDK, you will have to execute the apt in the following manner:
sudo apt install openjdk-[version_no]-jdkFor your reference, here, I installed the JDK version 17:
sudo apt install openjdk-17-jdkTo install a specific version of JRE on Ubuntu
So if you are looking to install a specific version of JRE, you will have to execute the apt in the following manner:
sudo apt install openjdk-[version_no]-jreFor example, if I want to install JDK version 17, then I will be using the following command:
sudo apt install openjdk-17-jreInstall Oracle JDK in Ubuntu
Sadly, the Oracle JDK is not available in the default repository of Ubuntu so you will have to install the Debian package in Ubuntu manually.
To do so, first, visit the official download page of oracle java and choose between java 17 or 19.
And there, you will find the deb package available:
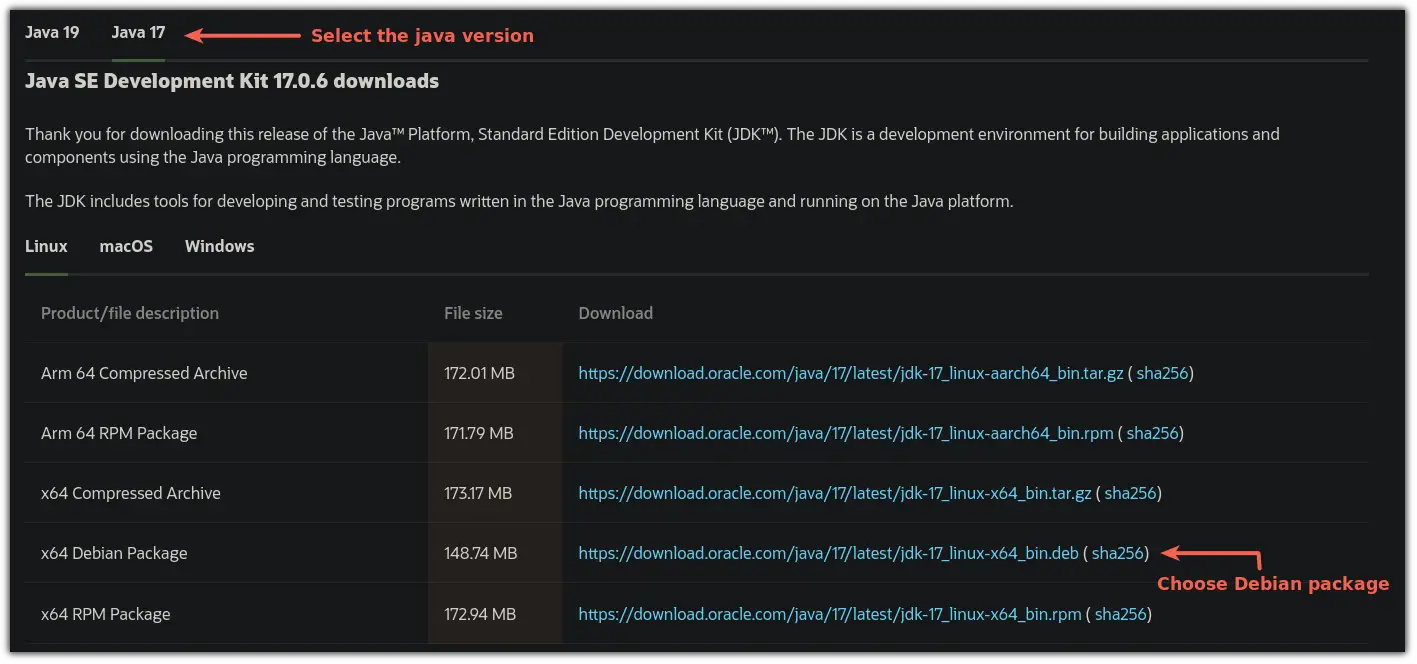
You may copy the link and download it via wget or use your browser. It is all up to you and I will be using wget to download the package:
wget https://download.oracle.com/java/17/latest/jdk-17_linux-x64_bin.debOnce done, you can easily install the downloaded deb package:
sudo apt install ./jdk-17_linux-x64_bin.debMake sure to change the package name accordingly!
Setup JAVA_HOME Environment
Setting up the home environment is not absolutely necessary but some packages like tomcat require this and queries while booting.
So the first step is to check whether you have installed multiple versions of java. If so, the following command will give you the list and path of each one:
sudo update-alternatives --config java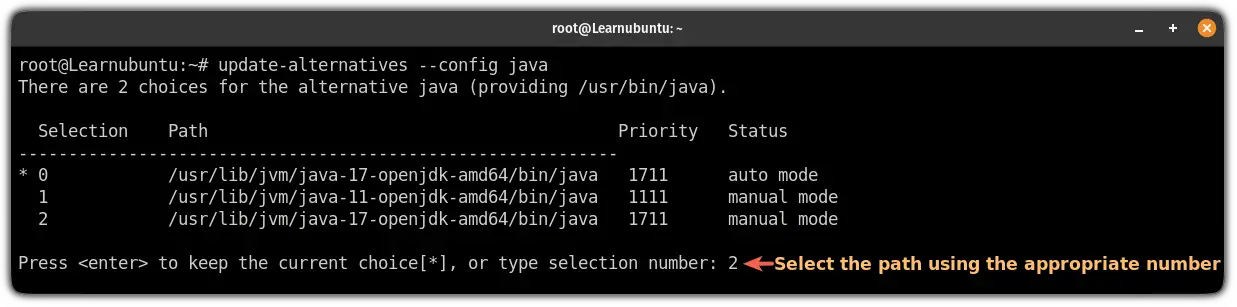
Also, copy the path of the selected version. I went with the JDK 17 here.
Next, open the environment file using the following command:
sudo nano /etc/environmentGo to the end of the line in nano using Alt + / and paste the path to java in the following manner:
JAVA_HOME="path/to/jdk"As I went with JDK 17, so I will be adding the following:
JAVA_HOME="/usr/lib/jvm/java-17-openjdk-amd64/bin/java"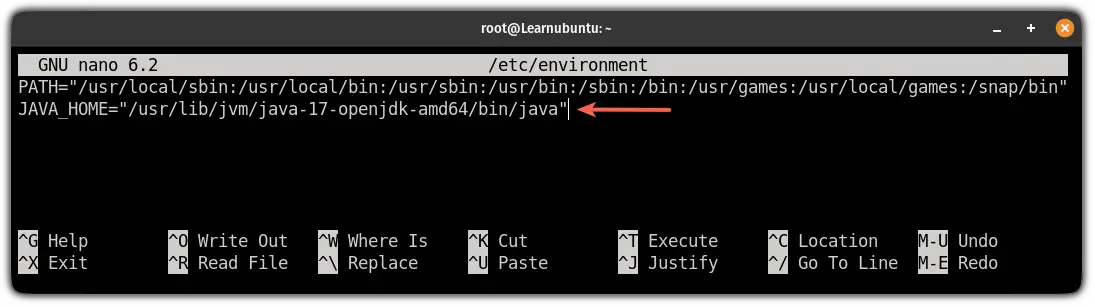
Save changes and exit from the nano text editor.
Once you are done, reload the environment config file:
source /etc/environmentAnd if everything goes as planned, if you print the environment variable of JAVA_HOME then, it should give you the path you configured:
echo $JAVA_HOME
And there you have it!
Uninstall Java from Ubuntu
If you followed any of the discussed methods, you will find the Java uninstallation method for each one here.
To remove the JDK (default):
sudo apt remove default-jdkTo remove JRE (default):
sudo apt remove default-jreTo remove a specific version of JDK:
If you installed a specific version of JDK, you will need to execute the apt remove in the following syntax:
sudo apt remove openjdk-[version_no]-jdkAs I went with JDK 17, I will have to execute the following:
sudo apt remove openjdk-17-jdkTo remove a specific version of JRE:
If you installed a specific version of JRE, then, you will have to execute the apt remove in the following manner:
sudo apt remove openjdk-[version_no]-jreAs I installed JRE 17, I will be using the following command for removal:
sudo apt remove openjdk-17-jreTo remove the Oracle JDK
Removing deb packages requires a little effort but is still doable.
First, you will have to know the package name by which the Oracle JDK is installed:
apt list --installed | grep -w 'jdk\|local'It will be installed locally and probably will be the first result:
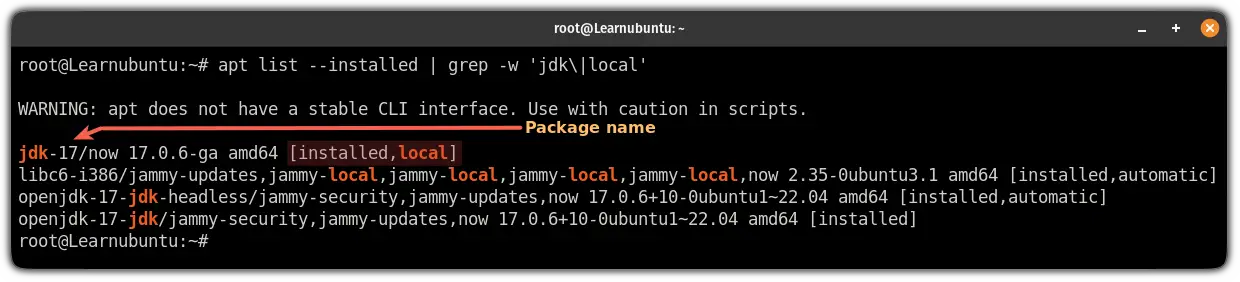
In my case, the package name is jdk-17 as I installed JDK 17. Sure, yours can be different!
Once you identify the package name, all you have to do is execute the apt remove and append the package name to it:
sudo apt remove jdk-17And that's it!
Want to learn how to run Java programs?
If you are just getting started in java programming and have no idea how to run the java program, we have a detailed guide on that topic:
 Abhishek Prakash
I hope this guide has solved how you can install java on Ubuntu.
And if you went through any errors while installation or have any other queries, let me know in the comments.

This article is submitted by one of the Learn Ubuntu community member who is not part of the core LU team.