Install nmap on Ubuntu
Learn to install the latest version of namp on Ubuntu. Also learn the basic usage of nmap in this tutorial.

If you are into network security or you just want to get started with networks, nmap is one of the most basic networking commands that you should know.
And in this tutorial, I will show you two ways of installing nmap:
- Using apt
- Using snap (to get the latest version)
Install nmap in Ubuntu
The nmap is available in the default repository of Ubuntu.
But you may get a slightly older version so if you don't care about having the latest version, it can easily be installed with the given command:
sudo apt install nmapOnce done, you can check the installed version using the following command:
nmap -v
And as you can see, the apt gave me the nmap version 7.80.
Need the most recent one? You can check the next method.
Removing nmap
If the given version of nmap is too old for you or it is not relevant anymore for you, it can be easily removed by the given command:
sudo apt remove nmapYou can check the installed version of nmap and it will give you an error saying No such file or directory:
nmap -v
Install the latest version of nmap in Ubuntu
If you want the most recent (stable) release of nmap, using snap packages is the best choice you can opt for.
As snap comes pre-configured with Ubuntu, the nmap can easily be installed with one single command:
sudo snap install nmap
And as you can see, it gave me the nmap version 7.93.
To have a seamless experience with nmap (snap version), you will have to grant network access by the following command:
sudo snap connect nmap:network-controlHow to remove nmap from Ubuntu
To remove the snap package of nmap, all you have to do is execute the following command:
sudo snap remove nmap
Using nmap
Here, I will be sharing some practical examples of how you can use nmap to search for vulnerabilities on your network.
Search open ports on the network using the nmap command
To search for open TCP ports on your network, all you have to do is append the target IP or domain with the sT flag:
nmap -sT scanme.nmap.org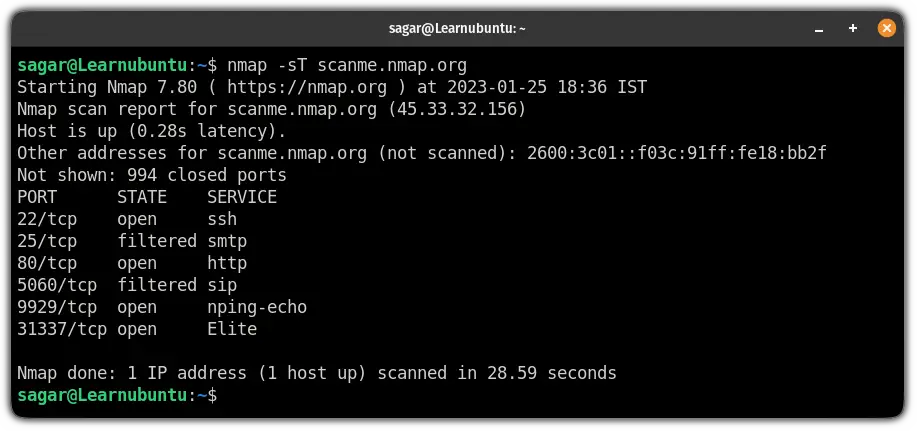
Once you find open ports, you should close them.
Don't know how to? Here's the guide:

Similarly, to search for open UDP ports, you can use the -sU flag:
sudo nmap -sU scanme.nmap.org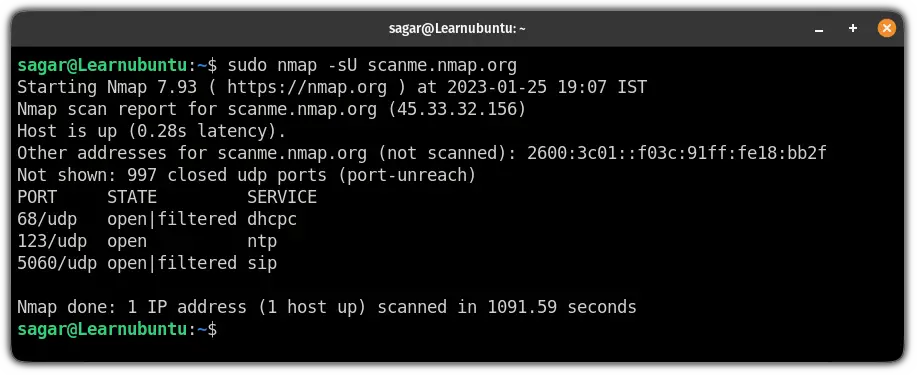
Scan specific ports using nmap
To search for a specific port, you will have to append the port number to the -p flag.
For example, if I want to search for port 443 (one of the most common networking ports used for HTTPS), I will be using the following command:
nmap -p 443 scanme.nmap.org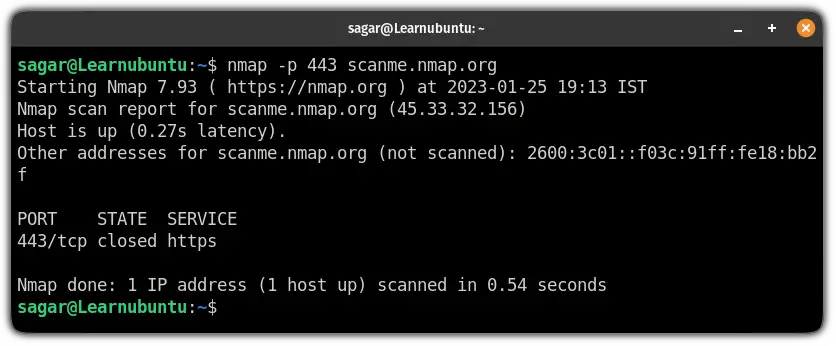
As you can see, the port of 443 is closed!
Scan multiple ports using the nmap command
With a slight change in format to the above command, you can scan multiple ports.
All you have to do is append multiple port numbers separated by comma ( , ) and that's it.
For example, here, I searched for port no. 22,80 and 443:
nmap -p 22,80,443 scanme.nmap.org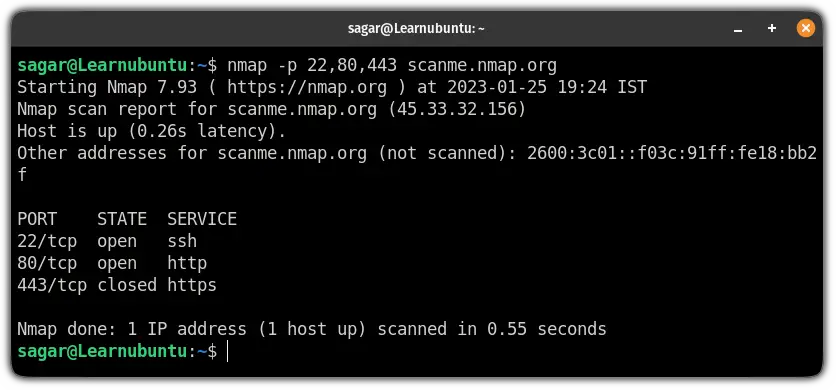
That's it from my side.
But you can do a lot more with nmap. Here's the detailed guide on port scanning with the nmap command:

New to networks? Start with basics
If you are new to networks, you should start with some basic networking commands and their use:

I hope you will find this guide helpful.
And if you have any queries related to this or any other topic, let me know in the comments.
A software engineer who loves to tinker with hardware till it gets crashed. While reviving my crashed system, you can find me reading literature, manga, or watering my plants.


