How to Run Jar Files in Ubuntu
Having troubles with the Jar file? Learn how to install Jar files in Ubuntu using both GUI and the terminal.
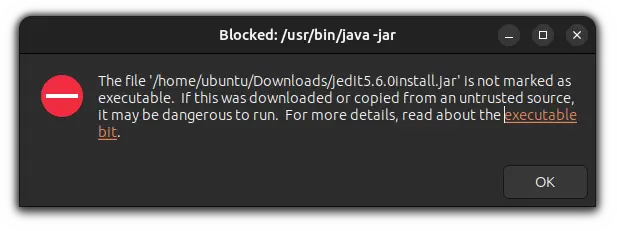
While working with Java, you will come across the .jar files one day like I did yesterday, and guess what? I had no idea how to access a jar file in Ubuntu and I was given the following error:

But then I got to know that I had some missing dependencies as well and it required some additional steps to be executed.
So in this tutorial, I will walk you through two methods including how to satisfy the prerequisites of running a jar file in Ubuntu:
- Installing Java runtime environment (prerequisite)
- Method 1: Using GUI to run JAR files
- Methos 2: Using the terminal to run JAR files
Let's start with the prerequisite part.
Install prerequisites first 💡
Irrespective of what method you choose to run JAR files, it is necessary to install the JRE (reads for Java Runtime Environment).
First, check if it is already installed or not using the following command:
java --version
If it shows the OpenJDK version as above, then your system already has satisfied the requirements to run the JAR files.
But if you are not lucky enough, then it may give an error saying the command java not found:

Worry not! You can install Java using a single command:
sudo apt install default-jreThat should do it. Now, let's explore different methods of running JAR files in Ubuntu.
Method 1: Using GUI
If you have access to GUI, then it is pretty easy to run JAR files.
All you have to do is follow two simple steps:
- Make the file executable from the file manager
- Execute the JAR file with OpenJDK
Sounds complex? Here's a step-by-step guide.
First, open the file manager and navigate to a directory containing the JAR file.
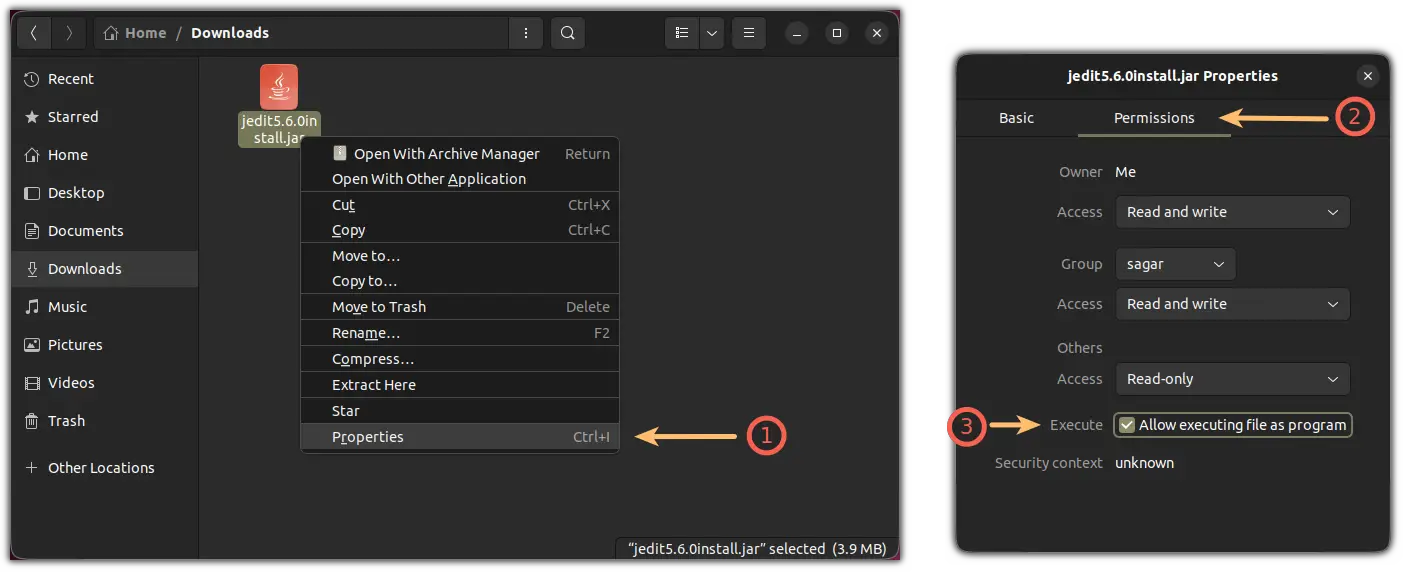
Next, right-click on the JAR package and click on Properties.
It will open a properties prompt where click on the Permissions tab and check the box labeled as Allow executing file as program:

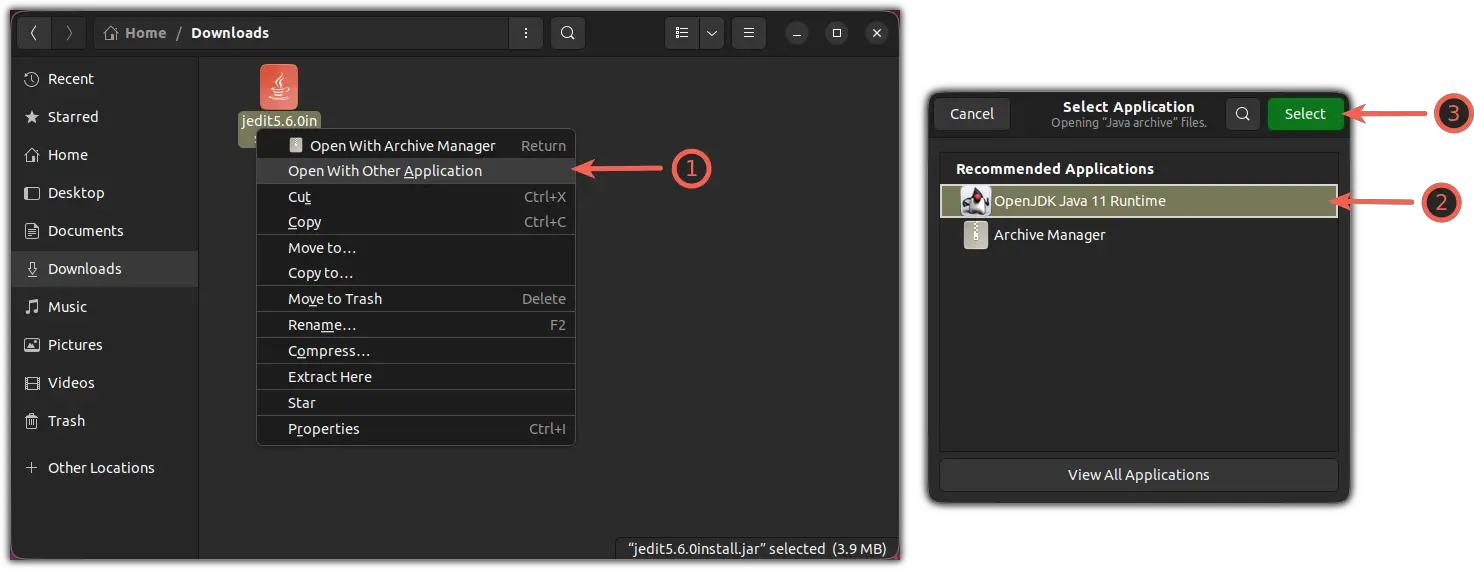
Once done, right-click on the JRE file again, choose the second option Open with Other Application , and from there, choose the OpenJDK Java Runtime option:

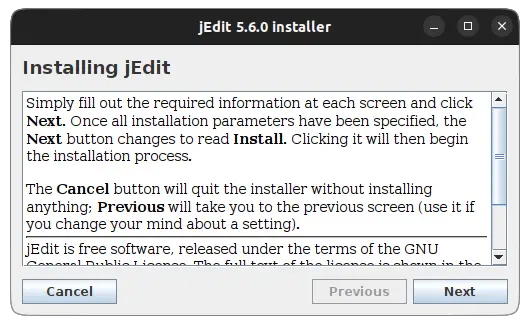
That's it! It will now be running the selected JAR file. In my case, it was jEdit installer:

Method 2: Using the terminal
If you prefer using the terminal, you can achieve the same results as GUI but with reduced number of steps.
The first step is to use the cd command to change the directory in which the JAR file is located:
ca /path/to/JAR/directoryFor most users, the downloaded file will be inside the Downloads directory:
cd ~/DownloadsOnce done, use the chmod command to make the file executable:
chmod +x filename.jarFinally, use the java command with the -jar flag to run the JAR files as shown:
java -jar Filename.jarYep, that's all it takes to run JAR files in Ubuntu.
Conclusion...
This was a quick tutorial explaining how you can run JAR files in Ubuntu using two methods so you can choose what suits your workflow the most.
I hope you will find this guide helpful.
A software engineer who loves to tinker with hardware till it gets crashed. While reviving my crashed system, you can find me reading literature, manga, or watering my plants.
