Using ssh-copy-id Command on Ubuntu
The ssh-copy-id command on Ubuntu helps you add your local machine's public key to remote server's authorized keys for password-less SSH access.

If you are into servers and deploy servers on a regular basis and use SSH to get into the system, the ssh-copy-id command can be a lifesaver for you.
Adding GPG key based password-less authentication is one of the ways to harden the SSH. More than security, I feel, it adds the comfort of a password-less entry.
Using the ssh-copy-id command, you can do it without any hiccups. The ssh-copy-id command adds your public key to the remote host's authorized keys and thus enable the password-less login in SSH. It also takes care of the correct file permissions on the files. In short, it saves several manual tasks.
In this guide, I will show you how to use the ssh-copy-id command to have a hassle-free SSH connection.
Use ssh-copy-id command
The ssh-copy-id command is part of the OpenSSH package and you'd find it pre-installed in most Linux systems.
But somehow, if you don't have it, you can easily install SSH on Ubuntu using the following command:
sudo apt install openssh-clientOnce you have it, you can start with the shown steps to send your public key using the ssh-copy-id command and have password-less SSH.
Prerequisite: Generate SSH keys
To enable GPG key based login, you need to have GPG based SSH keys first.
If you have used SSH on this machine to connect to remote server, you should already have the SSH keys.
Still, verify it by checking the content of the .ssh folder in your home directory.
ls ~/.sshYou should see id_rsa and id_rsa.pub files here.

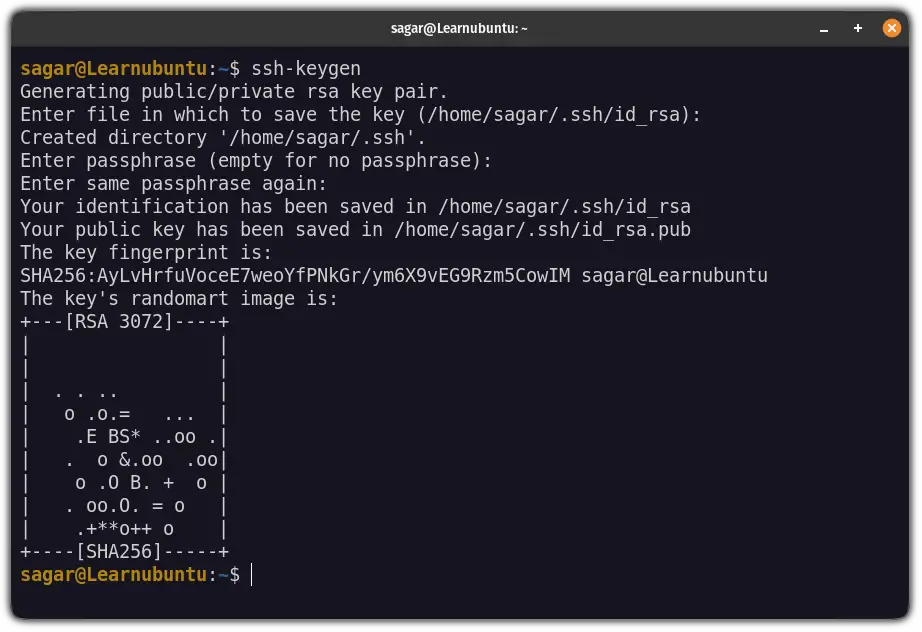
If you don't see this folder or if it is empty, you need generate SSH keys on Ubuntu. Run the following command:
ssh-keygenYou can follow the simple procedure easily.

If you need details, this tutorial will help you out.

Step 1: Add the public key to your remote server
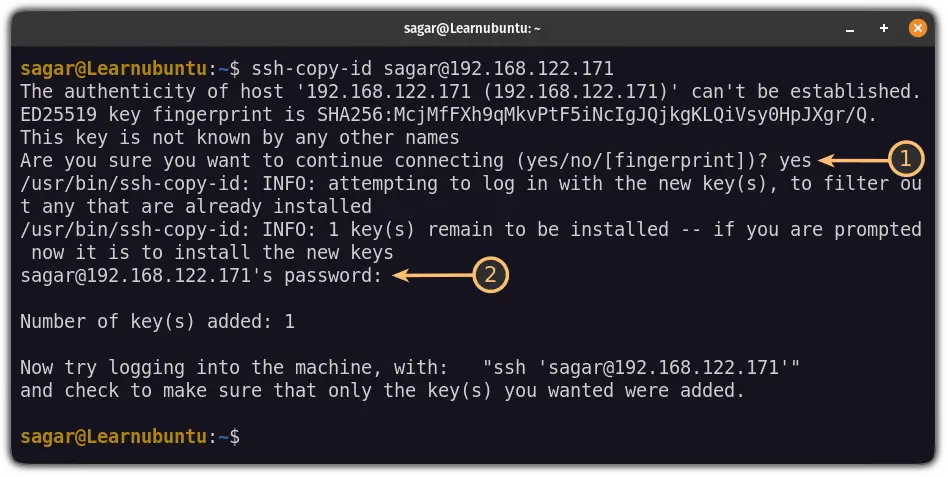
Once you are done with key generation, you can use the ssh-copy-id command in the following manner to copy the public key to your server:
ssh-copy-id username@server-ipUsername is the user on the server, not the local machine. It could be root or other user on the server for which you have access via password.

If you notice carefully, I entered the password but still wasn't logged in to the system.
The reason is simple. The password was asked by SSH as it needs to access your remote system to copy your public key to the ~/.ssh directory and the file would be named as authorized_keys.
On the server, you can check the content of the authorized keys to see if your local system's key was added.

Step 2: Use SSH without a password
Once you use the ssh-copy-id command successfuillu, you no longer have to enter password while using SSH to connect to the remote server.

And as you can see, it didn't ask for the password!
Few things to know
If you use more than one user on the server, and you want password-less SSH access for all of them, you have to use the ssh-copy-id command for each users. You must know the password for each user, of course.
Similarly, if you access several servers, you need to run ssh-copy-id for each server.
This way, you don't need to enter the passwords for each user and each machine. It saves a lot of time and hassle.
By the way, if you use several servers, you can use ~/.ssh/config files and add server details there. This way, you don't even need to remember IP addresses of the servers. How cool is that!

Enjoy the hassle free SSH experience :)
A software engineer who loves to tinker with hardware till it gets crashed. While reviving my crashed system, you can find me reading literature, manga, or watering my plants.


