

You may encounter scenarios where you have to use different Java versions for each project or you have your own reasons and that's totally fine.
So in this tutorial, I will guide you through how you can install different versions of Java and then choose between multiple options.
Install different versions of Java
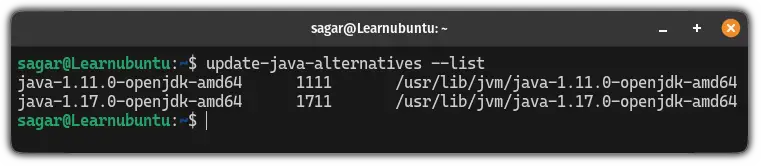
The first and most obvious step is to verify that to check if you have multiple versions of Java installed or not.
For that, you can list down the installed versions of Java using the following command:
update-java-alternatives --list
Unlike me (from the above snapshot), if you have multiple versions, and if it does, simply skip to the next section.
But if you have only one version installed (like I have), you can install various versions of Java in Ubuntu and to check available versions, use the following command:
apt list -a openjdk-*-jdk*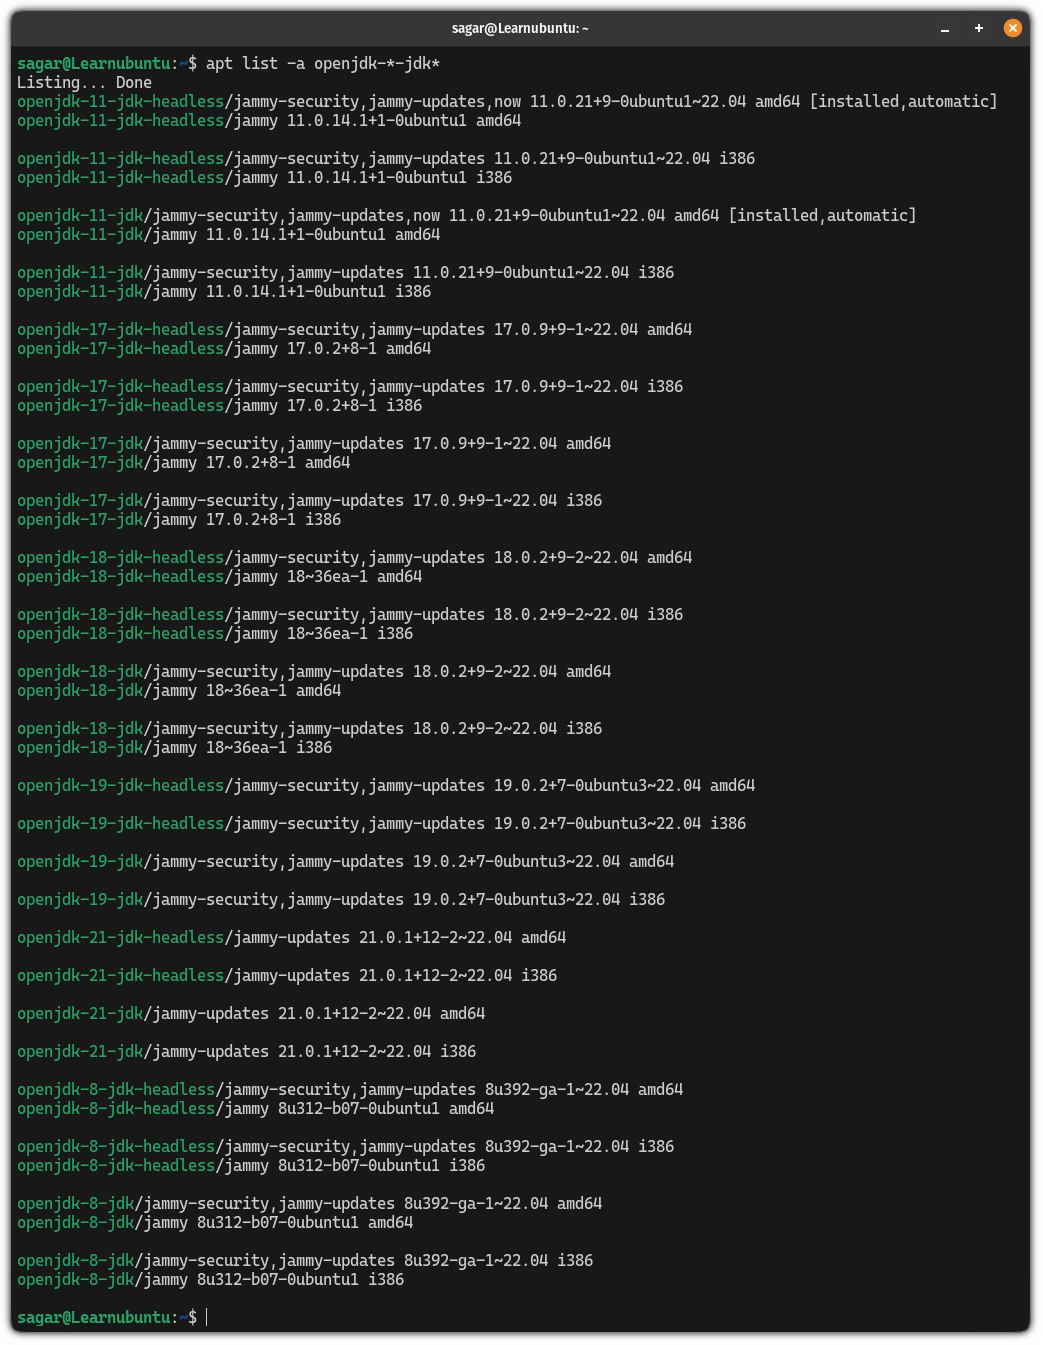
While writing, there are 6 versions of Java available: Java 8, 11, 17, 18, 19, and 21.
Once you find the appropriate version, use the version number in the following command:
sudo apt install openjdk-[version_no]-jdkI will be installing Java 17, so I will be using the following command:
sudo apt install openjdk-17-jdkNow if you list the installed versions, you should have more than one option to choose from:
Change Java version in Ubuntu
In this tutorial, I will walk you through two ways you can change the Java version in Ubuntu:
- Using the
update-alternativescommand - Using the G alternatives utility (GUI method)
Both are pretty easy so you can choose irrespective of complexity level.
Let's start with the first one.
Using the update-alternatives command
To change the Java version using the alternatives, use the --config flag and append java as shown here and it will list down available options to choose from:
sudo update-alternatives --config java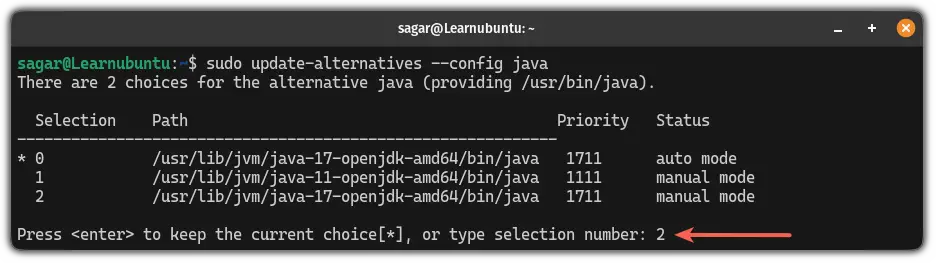
From the list, select the desired option and enter the respective number associated with the choice as I did for Java 17.
Now, if you check the Java version, it should reflect the change you've made:
java --version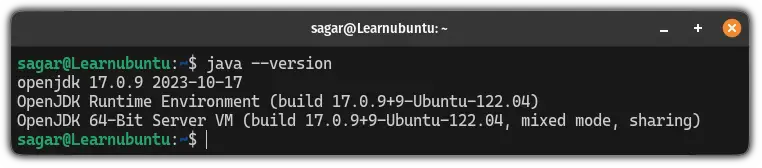
There you have it!
Using the G alternatives utility (GUI method)
The G alternatives is a GUI frontend for the update-alternatives (a method that I discussed earlier).
First, install G alternatives in Ubuntu using the following command:
sudo apt install galternativesOnce done, start the utility from the terminal:
sudo galternativesChoose the java from the left column and choose from the available options:
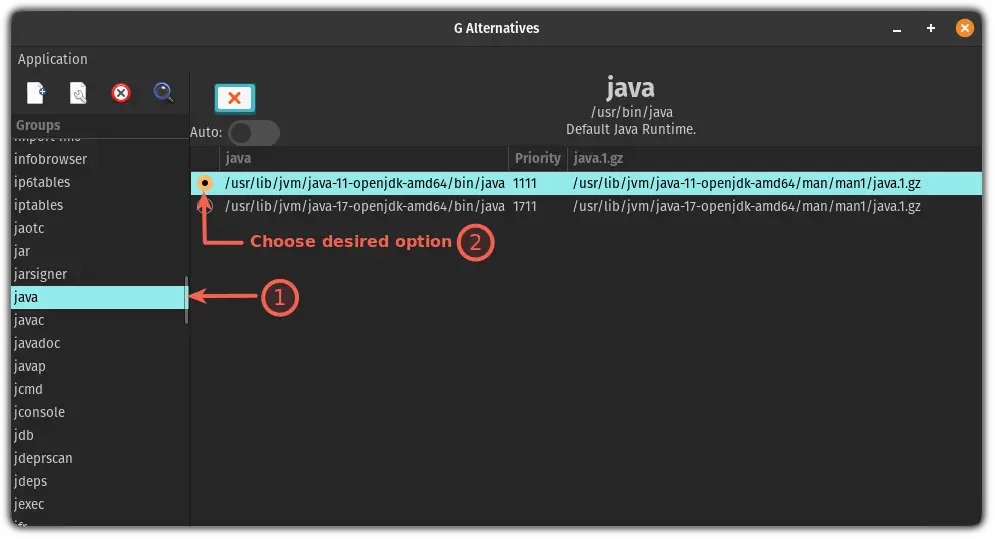
Yep, just select the Java version and it will make it default for you.
To verify the change, you can check the Java version:
java --versionTo demonstrate the usage of G alternatives, I changed my default version to Java 11 and it must reflect while checking the version:

Yes, it did 🙌.
The next step: Setup JAVA_HOME variable
After changing the Java version, it is important to set up the JAVA_HOME variable to not have any issues while coding in modern IDEs.
To learn how to set JAVA_HOME in Ubuntu, you can refer to guide detailed guide on that subject:
 Abhishek Prakash
I hope you will find this guide helpful.
Subscribe


