How to Install and Configure Apache in Ubuntu
Exploring Apache web server? Learn how to install Apache on Ubuntu and setup a virtual host on it in this tutorial.

Want to configure a web server without headaches? Apache is the answer.
Apache is a free and open-source web server mostly preferred by those who want to have a web presence without going too much technical.
And in this tutorial, I will walk you through:
- Installing Apache on Ubuntu
- Configuring Apache on Ubuntu
- Setup virtual host on Apache
So let's start with the installation.
How to install Apache in Ubuntu
Being super popular, Apache is already available in the default repository of Ubuntu.
And can easily be installed with the following command:
sudo apt update && sudo apt install apache2To confirm the installation, you can check the installed version of Apache:
apache2 -v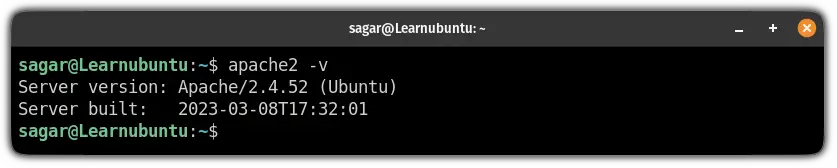
If you see similar output, Apache is successfully installed!
How to configure Apache on Ubuntu
Check the ufw firewall status and if the firewall is running, the first step in the configuration is to allow the Apache to pass through the UFW firewall.
You can use 3 profiles to allow Apache:
Apache: This profile will open port no. 80 (unencrypted)Apache Secure: This profile will open port no. 443 (TLS/SSL encrypted)Apache Full: This profile will open both ports 80 and 443.
I will go with the 3rd profile to have a secure connection:
sudo ufw allow 'Apache Secure'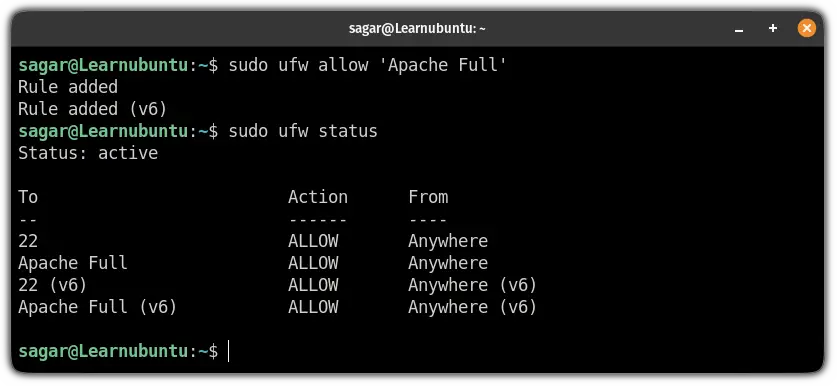
Next, start the Apache service:
sudo systemctl start apache2And configure it to start itself on every system boot:
sudo systemctl enable apache2
How to setup Virtual Host on Apache
Virtual hosts are similar to server blocks you get in NGINX where you can use more than one domain from a single IP.
And Apache gets one server block enabled by default located at /var/www/html.
But I'm going to create a new virtual host at /var/www/.
First, create a new directory inside /var/www/ with the desired domain name:
sudo mkdir /var/www/domain_nameHere, I'm going with LU:
sudo mkdir /var/www/learnubuntuNext, give ownership of the recently created directory to the user using the chown command:
sudo chown -R $USER:$USER /var/www/domain_nameNow, change the permissions as per your needs. I would suggest going with 755 where the owner gets all rights and others can only read and execute:
sudo chmod -R 755 /var/www/domain_nameAfter this, create a sample index file and open it:
sudo nano /var/www/domain_name/index.htmlAnd add the following to the file:
<html>
    <head>
        <title>Welcome to Learnubuntu!</title>
    </head>
    <body>
        <h1>Success! The LU virtual host is working!</h1>
    </body>
</html>
Save changes and exit from the nano text editor.
To serve the content you added in the index file, you will have to create a virtual host file:
sudo nano /etc/apache2/sites-available/domain_name.confAnd add the following to the file:
<VirtualHost *:80>
    ServerAdmin webmaster@localhost
    ServerName  domain_name
    ServerAlias www.domain_name
    DocumentRoot /var/www/domain_name
    ErrorLog ${APACHE_LOG_DIR}/error.log
    CustomLog ${APACHE_LOG_DIR}/access.log combined
</VirtualHost>
Save changes and exit from the text editor.
Now, enable the config file using the a2ensite utility:
sudo a2ensite domain_name.conf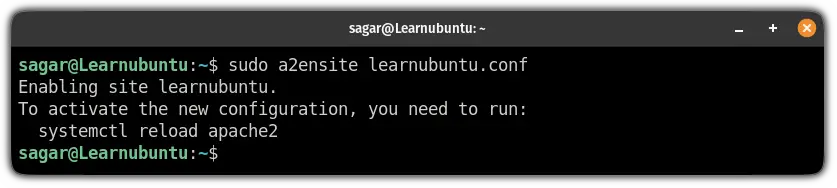
Next, disable the default config file located at /etc/apache2/sites-available/000-default.conf:
sudo a2dissite 000-default.confAnd test the syntax for the config file:
sudo apache2ctl configtest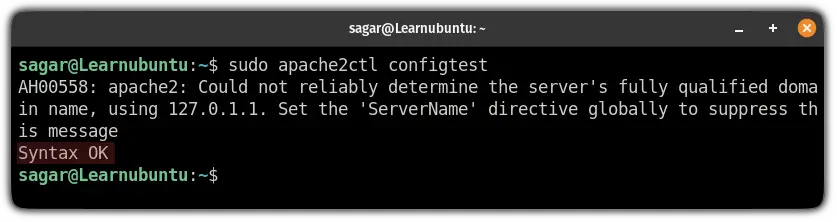
Next, restart the Apache service to take effect from the changes you have made:
sudo systemctl restart apache2Finally, enter the IP address of the system where Apache is installed and you will get the same message that you configured in the index file:

In a related post, you can read about installing Ansible.

Want to install OpenSSL? Here's how to do it
While installing OpenSSL is the only way to get the most recent version, it requires you to go through some complex steps.
But afraid not. We have a detailed guide for that purpose guiding you at every step:

I hope this guide will solve all the queries you had before.
And if you encounter issues while executing, let me know in the comments.

A software engineer who loves to tinker with hardware till it gets crashed. While reviving my crashed system, you can find me reading literature, manga, or watering my plants.