Using UFW Firewall Commands
A detailed beginner's guide to using UFW firewall in Ubuntu command line. There is also a cheat sheet you can download for free.

The UFW (uncomplicated firewall) is the easiest firewall you can use on Linux as it is simple and powerful simultaneously.
So in this guide, I will share some common commands you should know if you are using or willing to use UFW in the near future.
Basic UFW Firewall commands
Here, I will be sharing examples of each command and in the end, I will attach a pdf and table for a summary.
Here's a quick summary of what I'm going to share in today's guide:
| Command | Description |
|---|---|
| ufw status | Check the status of the UFW firewall. |
| ufw enable | Enable the UFW Firewall. |
ufw allow <rule> |
Allow port/service through the UFW firewall. |
ufw deny <rule> |
Drop the connection from a specific port/service on the UFW firewall. |
| ufw status verbose | Get the detailed (verbose) status of the UFW firewall, which also includes logging levels. |
| ufw status numbered | Shows UFW rules with numbers, which is helpful when you want to remove rules. |
ufw reject <rule> |
Reject connection from specific port or service. |
ufw logging <logging_level> |
Change the logging level of the UFW firewall. |
ufw delete <rule/number> |
Delete the UFW firewall rule. |
| ufw reload | Reload the UFW firewall. |
| ufw disable | Disable the UFW firewall. |
You can download the above table as a cheat sheet at the end of this guide.
1. Chek the status of UFW firewall: ufw status
To check the status of ufw firewall, you will need to append status flag with the ufw command:
sudo ufw status
And for new users, ufw must be deactivated. So how are you supposed to activate your firewall? Well, here's how you do it.
2. Enable UFW Firewall: ufw enable
To enable ufw firewall on Ubuntu, all you have to do is execute the following command:
sudo ufw enable
3. Allow ports through UFW Firewall: ufw allow <rule>
There are multiple ways to allow ports through the UFW firewall in Ubuntu.
To allow any port or service, you are required to follow the given command syntax:
sudo ufw allow <rule>And <rule> is where you specify the port number or the name of the service you want to allow through your firewall.
For example, if you want to allow ssh through the firewall, use:
sudo ufw allow ssh
You can also be more specific with your rules.
Such as if you want to accept connections from specific IP for a particular service, you can also do that.
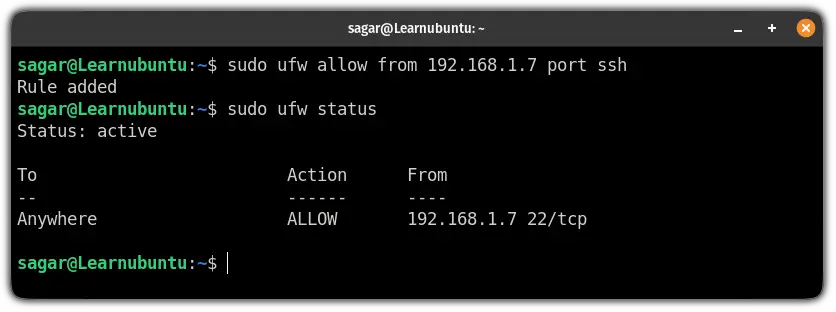
For example, here, I have allowed 192.168.1.7 to accept connections for SSH:
sudo ufw allow from 192.168.1.7 port sshThis means it will only accept ssh connections from specified IPs (192.168.1.7 in my case):
4. Deny ports through UFW Firewall: ufw deny <rule>
If you want to block certain ports (that you should), you can refer to the given command syntax:
sudo ufw deny <rule>So let's say I want to block port number 80 then I'm required to use the following:
sudo ufw deny 80
5. Get the detailed status of the UFW Firewall: ufw status verbose
Previously, I explained how you can know the status of the UFW firewall that will show the applied rules.
But what if you want to know more detailed output including logging level, default rules, etc.? You append the verbose flag:
sudo ufw verbose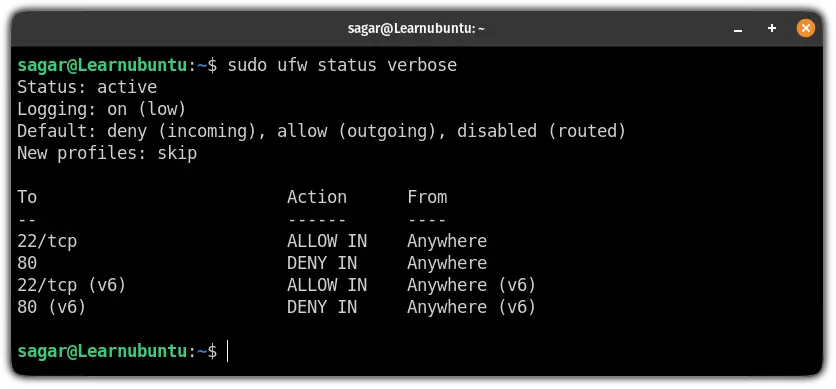
And in case, if you have no idea what logging is and what the default rule means, we have a detailed guide for that:

6. Reject network connections using the UFW Firewall: ufw reject <rule>
You must be wondering about the difference between denying and rejecting the connection.
When you use the reject rule, the attacker will find your server unreachable.
Whereas, the deny rule will drop the connection and won't let the attacker find your IP.
To reject the connection, you can refer to the given command syntax:
sudo ufw reject <rule>For example, if I want to reject every connection from port no 22, I will be using the following command:
sudo ufw reject 22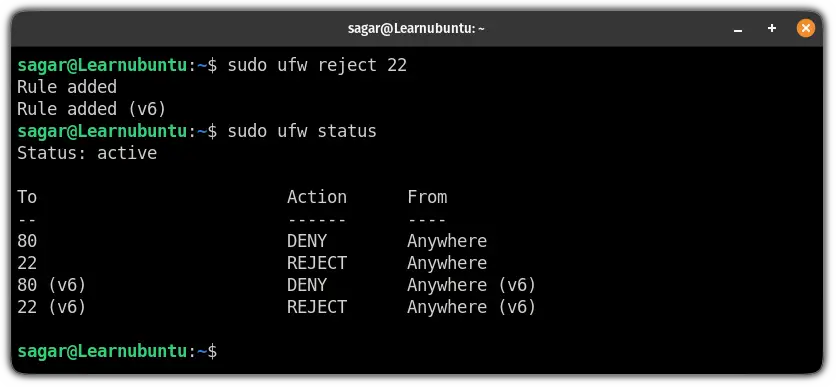
7. Change UFW Firewall logging level: ufw logging <level>
There are five levels of UFW firewall logging:
Off: No logging.low: Shows logs related to blocked packets, connections matching rules, and not matching rules.medium: In addition to the low level, you get logs related to invalid packets, and new connections, and logging is done using the rate limiting.high: When used, it logs the packets with and without rate limiting.full: Everything remains the same as the high level but without rate limiting.
Now, you may change the logging level according to your preference using the given command syntax:
sudo ufw logging logging_levelSo let's say I want to switch to the medium level logging, then I will be using the following command:
sudo ufw logging medium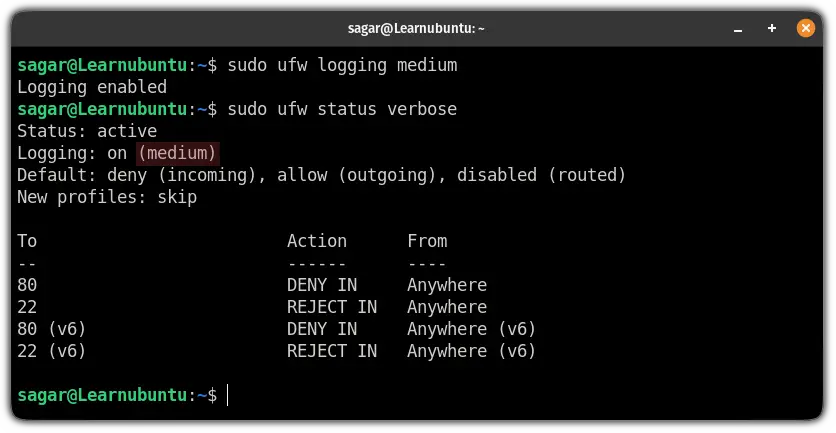
9. Delete UFW Firewall rule in Ubuntu: ufw delete <rule/num>
There are two ways by which you can delete the ufw firewall rule.
One is by appending the rule (the port number or service) to the delete flag:
sudo ufw delete <rule>But it is not the most elegant way of removing the rule.
And here comes the second way of removing firewall rules: using the rule index numbers.
To know the exact number of rules you want to remove, first, execute the following command:
sudo ufw status numbered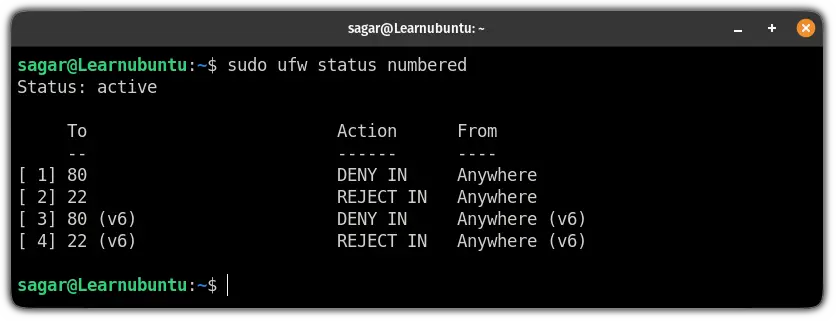
Now, all you have to do is append the number to the delete flag and the rule will be removed.
For example, if I want to remove the rule associated with port number 80, then, the following should work:
sudo ufw delete 1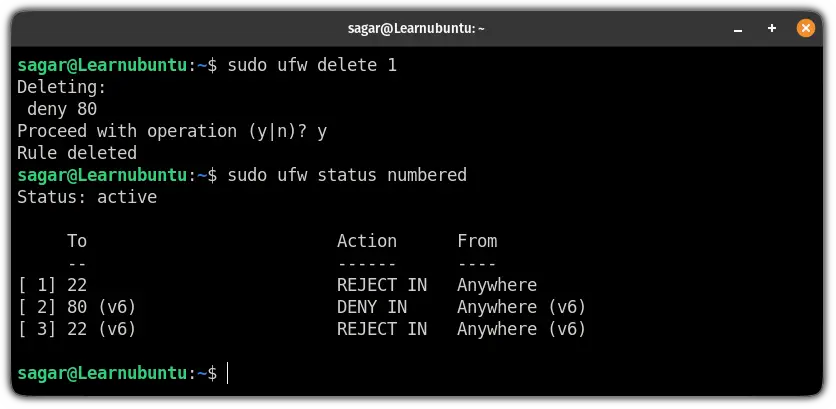
8. Reload UFW Firewall in Ubuntu: ufw reload
If you want to reload your ufw firewall, it can easily be done using the following command:
sudo ufw reload
9. Reset UFW Firewall in Ubuntu: ufw reset
If you want to start adding rules from scratch, you should remove all the existing rules.
And best way to remove every rule is to reset the firewall:
sudo ufw reset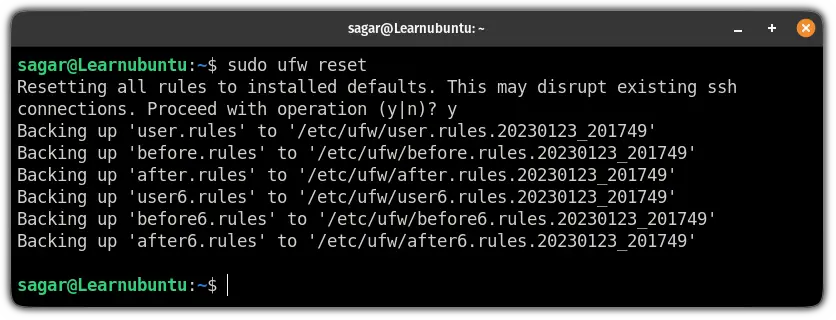
10. Disable UFW Firewall in Ubuntu: ufw disable
And if you no longer want to use the ufw, it can easily be disabled by the following command:
sudo ufw disable
Download the UFW Firewall cheatsheet
If you want to carry the summarised version of this guide, we have created a PDF that contains a short description of every command used in the above guide:
Any comments?
Before I invite you to share your feedback on this article in the comment section, let me share a last UFW tip. And it is about comments.
Yes. You can add comments to UFW rules. As always, comments make things easier to understand.

I hope you find this guide helpful in starting with UFW on Ubuntu. If you have any queries or suggestions, feel free to drop them in the comments.
A software engineer who loves to tinker with hardware till it gets crashed. While reviving my crashed system, you can find me reading literature, manga, or watering my plants.

